Summerland’s Best Kept Secret & Wine Experience Destination
Sip award‑winning BC wines on a sunny Summerland patio
with self‑serve pizzas, craft beer & sweeping Okanagan views
Visit Us
Enjoy
award-winning wines and delicious pizza on our stunning patio
Red Iron Grille Hours:
Monday to Sunday 11:00AM - 4:00PM
Wine Shop Hours:
Monday to Sunday: 11:00AM - 5:00PM
Tasting Bar closes daily at 5:00pm.
Walk-in Only
We look forward to seeing you!
Follow Us On Instagram

It’s finally here—Oilers Home Opener night! 🏒
The Battle of Alberta kicks off as the Edmonton Oilers face their biggest rivals in a classic showdown to start the season tonight.
We’ve been keeping quite the secret… 👀 Some of you may have spotted our fancy new Oilers jersey hanging in the wine shop. For those who haven’t, the secret is out—we’re officially partnering with the Edmonton Oilers again this season!💙🧡
We couldn’t be more excited to be part of the action and look forward to serving you at Rogers Place all year long. Here’s to great hockey, unforgettable moments, and raising a glass to the oilers! (Even if they aren’t your team 😉)
•
•
•
#LetsGoOilers #BattleOfAlberta #HomeOpener #oilcountry #bcwine #winesofbc #edmontonoilers #edmonton #okanagan #partnership #hockey #NHL #supportlocal #shoplocal #bc

Forecast shows: Patio season is still here☀️
Our tasting room & wine shop are open year round, but our patio will come to a close on October 26th! Come soak up the sun while it lasts! The pizzas are hot, the wine is flowing, and we’d love to raise a glass with you🍷
•
•
•
#wine #winelovers #winetime #winetasting #wineshop #cheers #pizzalovers #foodie #eats #drinklocal #savorlife #patioseason #patioseasonisnotover #fallvibes #sunnydays #octoberfun #supportlocal #winerylife #smallbusinesslove #gatherhere #bcwine #winesofbc

POV: you’re sipping in the Okanagan and the vibes are widescreen only🎥
•
•
•
#WineTime #WineryVibes #SipSipHooray #WineNot #InVinoVeritas #DrinkBetterWine #WineLovers #JumpingOnTheTrend #TrendySips #WideScreenWine #SipTok #VinoViews #5120x1080 #bcwine #okanaganwine #winetasting #okanaganvalley #supportlocal #shoplocal

Meet our 2025 Harvest Crew! 🍇
Our Winemaker Mason, Assistant Winemaker Chris, and Cellar Hand Luke are the trio behind making DLW wines so special! Of course, this is only part of the story. Our full crew is far too many hardworking individuals to capture in one photo. Each person plays a vital role in making Harvest 2025 possible.
Here’s to our entire crew for working their butts off! Cheers to you all! 🥂
•
•
•
#Harvest2025 #WineHarvest #Winemaking #VineyardLife #CellarCrew #GrapesToGlass #CrushSeason #WineryLife #WineLovers #WineCountry #HarvestCrew #WineryFamily #CheersToTheCrew #WineLife #BehindTheBottle #DreamTeam #HardWorkPaysOff #WineCommunity #FromVineToWine #bcwine #winesofbc

From Vine to Bottle🍷
Harvest season in the Okanagan isn’t just about stunning vineyard views. It’s about the heartbeat of winemaking.
Each glass tells a story: grapes developed through the seasons, hand-picked at their peak, crushed, and transformed into something extraordinary. From aging in oak or steel to the final bottling, every step captures the essence of the land, the climate, and the winemaker’s craft.
Whether it’s a crisp white, bold red, or refreshing rosé, every sip is months (and sometimes years) of passion distilled into a single experience.
Want to dive deeper into the journey?
Tap the link in bio to read our latest blog!
•
•
•
#winemaking #vinetobottle #winesofbc #bcwines #okangan #shoplocal #supportlocal #grapes #vineyard #harvestseason #winemaking #winecountry #wine #winelover #winetasting #winestagram

Harvest 2025 is here! 🍇
This season feels extra special after the ups and downs of last year, and we couldn’t be more grateful to see our vines thriving again. As we pick these grapes, we’re reminded of the joy, hard work, and love that go into every bottle we make.
Thank you for walking this journey with us and for being part of our winery family! We can’t wait to share the future tasty wines of this harvest with you.
•
•
•
#Harvest2025 #CrushSeason #WineryLife #FromVineToWine #GrapeHarvest #WinemakersLife #WineryLove #NewVintage #SupportLocal #DrinkLocal #ShopLocalBC #BuyLocal #SupportSmallBusiness #CommunityStrong #winesofbc #bcwine #okanaganwine #winetasting #okanaganvalley #bottleneckdrive

Introducing the Summerland Food Map! ✨
We’ve been exploring our town to bring you the ultimate food + wine adventure. Each stop celebrates the flavours of Summerland, the people behind them, and the wines we love to share!
📍 Stop #1: Dirty Laundry Winery
Of course start your journey with us! Sip on our wines, enjoy a bite, and soak up the views while the historic steam train passes by. Don’t forget to wave!
📍 Stop #2: Summerland Golf & Country Club
Up on the hill, Chef Andy serves a mouthwatering Reuben Poutine. Bold flavours meet our Kay Syrah for a pairing that’s rich, savoury, and unforgettable.
📍 Stop #3: Giant’s Head Brewing
Downtown vibes with a twist! Pair a refreshing Hush Rosé with their hearty Quinoa Bowl. Crisp tofu, chickpeas, peppers, and Mr. Sly sauce—healthy never tasted this good.
📍 Stop #4: Zias Stonehouse
A Summerland classic! Order the fiery, tableside Saganaki and pair it with our Sauvignon Blanc. Citrus, cheese, and wine in perfect harmony.
📍 Stop #5: Shaughnessy’s Cove
Lakeside dining at its best. Sticky Chicken tossed in sweet & spicy gochujang sauce, perfectly balanced by our Pinot Gris. A flavour combo that keeps you coming back. Trust us!
We’re so grateful to our Summerland friends for celebrating our wines with their dishes. Follow the map, explore the town, and tag us so we can join your journey!
•
•
•
#Summerland #FoodieAdventure #WineAndDine #OkanaganEats #FoodMap #bcwines #summerlandfood #winery #restaurant #bc #bcharvest #support #supportlocal #shoplocal #canada #foodie #food #yummy #CAD #okanaganvalley #bottleneckdrive #drinklocal #explorebc #vqa

Big News: We’re Now Dog-Friendly! 🐾
We’re so excited to welcome The Dog House to our winery! While only certified service dogs may join you in our main patio and wineshop, we’ve created a special dog-friendly upper patio where your pups can relax in the shade with fresh water while you sip and snack.
Bring your four-legged friends and enjoy our new space together—it’s the pawfect way to wine and unwind!
•
•
•
#dogfriendly #winery #dogwinery #summer #fall #summerland #bc #winesofbc #shopsmall #shoplocal #support #canada #wine #wines #dogs #puppies #patio #dogpatio

We’re Open for Fall — Come Sip With Us!
Our new hours are here, and the vineyard is as beautiful as ever! The Red Iron Grille is still open this season — stop by for a glass of wine and a bite while you take in our stunning views!
•
•
•
#hours #summer #supportlocal #summerland #winecountry #sipandstop #winesofbc #canada #fall #new

Happy BC Day from the heart of the Okanagan!
As a proud BC winery, we’re endlessly grateful for this beautiful province, and the community that brings us all together. Today is a day we encourage you to raise a glass and cheers with your fellow BC friends — whether you were born and raised in beautiful British Columbia or have recently made it your home. Today is a day to celebrate us! 💙💛❤️
We also would like to take this time to mention our thoughts are with everyone impacted by the wildfires — please stay safe, take care of each other, and let’s continue to support our amazing province with love.
•
•
•
#BCDay #OkanaganProud #CheersToBC #StaySafeBC #BCStrong #Shoplocal #supportlocal #support #canada #holiday #winesofbc #summer #cheers #summerland #penticton #okanagan #kelowna #okanaganlife #okanaganbc #okanaganwine

Slow down. Sip with intention. Grow with every glass.
Our latest blog explores how wine tasting can be more than just delicious— it can actually help you cultivate mindfulness, patience, and personal connection. Now, you can experience that for yourself at DLW with our new tasting experience: Sips & Snacks! 🍷🍴
What’s Included:
•4 chef-prepared bites!
•4 wines (or a beer flight!)
•Self-guided, seated, and savoured on our award winning patio!
Availability & Pricing:
•Offered Daily throughout the summer!
•Run hourly from 11am–3pm.
•$30 per guest (includes tax + gratuity)
•Reservations required 24 hours in advance.
Pairings change monthly—so every visit brings something new!
🔗 Click the link in bio to read the full blog and book your Sips & Snacks tasting today!
•
•
•
#SipsAndSnacks #DirtyLaundryWinery #WineWithIntention #SummerTasting #OkanaganWine #MindfulMoments #WineLovers #Supportlocal #Shoplocal #Winesofbc #winetasting #okanaganvalley #bottleneckdrive #drinklocal #vqa #explorebc

Blues & BBQ Night is Back! 🎵🍗
Join us July 31st from 6–8 PM for a finger-lickin’, soul-shakin’ evening with Gerry & The Blueshounds live on stage! Dig into our smoky BBQ ribs & chicken while you soak up the blues vibes.
Tickets: $59.95 per person
Seating is limited & communal — grab your crew and let us know if you’re coming together!
To Note:
•Our regular pizza menu won’t be available that night.
•Ticket sales end 7 days prior — don’t wait!
•No beverages included with the price of ticket.
•Email kristen@dirtylaundry.ca for seating requests.
Be sure to tap the link in our bio to get your tickets now!
•
•
•
#BluesAndBBQ #DirtyLaundryVibes #LiveMusicNight #SummerEvents #BBQandBlues #WineCountryNights #summer #shoplocal #supportlocal #winesofbc #canada #okanagan #okanaganwine #bcwine

GOLD FOR BORDELLO (AGAIN!)
We’re thrilled to announce that our 2020 Bordello has taken home a Gold Medal at the prestigious 2025 Winealign National Wine Awards of Canada—Canada’s largest wine competition! 🥇
We’re also proud to share two more medal wins:
🥉 2022 Merlot
🥉 2022 Kay’s Syrah
Pictured here are the three men behind the magic—our outstanding winemaking team. These awards wouldn’t be possible without their passion, precision, and dedication… and without you, our incredible supporters who keep raising a glass with us. Thank you!
With over 1,700 entries from 250 wineries across six provinces, we’re honoured to stand out among the best. Cheers to bold blends, beautiful vines, and the passionate team behind every bottle.
•
•
•
#winery #thankful #filledwithlove #summerland #winealign #winecountry #okanagan #supportlocal #wine #supportsmallbusiness #awards

Today’s not just about fireworks — it’s about the pride we feel in calling this place home 🇨🇦
We’re endlessly grateful to be a Canadian winery, supported by Canadian wine lovers like you. ❤️🍷
Here’s to shopping local, sipping something great, and celebrating all the things that make this country so special.
•
•
•
#ProudlyCanadian #ShopLocal #CanadianWine #SupportLocal #DrinkCanadian #CanadaDayVibes #WineCountry #support #canada #happycanadaday #okanagan #winecountry #winesofbc #dirtylaundrywinery #dlw

It’s Rosé Day, baby! 🥂
We’re pouring pink and feeling proud — We are proud to be one of the top selling rosé in all of BC, and it’s all thanks to you! Now it’s time to sip and celebrate🩷
If you’re sipping something special today… it better be pink. 😉
P.S. If you were on our SMS list, you might’ve seen a sweet little Rosé Day surprise. Wink wink!
•
•
•
#RoséAllDay #RoséDay #BCWine #nationalroseday #support #shoplocal #canada #bcwine #winesofbc

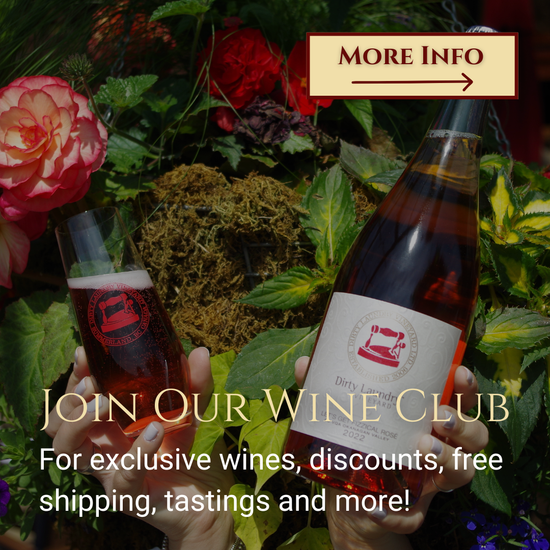
Join the Wine Club — Stay Connected, Sip Exclusive. Our wine club members get first access to new releases, special discounts, and invites to members-only events. It’s the perfect way to deepen your love of wine while supporting local. Sign up today and start enjoying the perks!
•
•
•
#summer #wineclub #winesofbc #supportlocal #summerland #dirtylaundrywinery #support #canada

Have Questions? Start Here.
From tastings and reservations to pet policies and drinks we offer, we've rounded up all the answers to your most common questions. This post is your go-to guide for visiting us. Still curious? Send us a message we're happy to help!
•
•
•
#hours #summer #supportlocal #summerland #winecountry #sipandstop #winesofbc #canada #faq #questions

Who says wine is just for dinner? From breakfast bites to fast food favourites, we’re pairing wine with everything — yes, even onion rings. Ready to break all the rules and find your new favorite combo? Click the link in bio to read today’s full blog! 🍷
•
•
•
#WineLovers #WinePairing #FoodieFun #BreakfastWine #ComfortFoodandWine #okanagan #shoplocal #winelover #supportlocal #summer #food #pairing #combonation #shopsummerland #shoppenticton #canada

We’re thrilled to share that we won SILVER in the Best of Penticton competition for Best Winery & Tasting Room!
This incredible recognition means the world to us — and it’s all thanks to YOU🥈🤍
Your support, votes, and love made this possible, and we truly wouldn’t be here without our amazing community.
Here’s to raising a glass with you all this summer — cheers!
•
•
•
#BestOfPenticton #SilverWinner #ThankYou #PentictonWine #GratefulHeart #WineryLove #summerland #penticton #shoplocal #winery #supportlocal #weappreciateyou

Raise a Glass to Dad!🍷🍻
This Father’s Day, celebrate the dads who fire up the grill, crack the best (or worst) jokes, and pour love into every moment. ❤️
Find the perfect bottle for Dad at @saveonfoods — with bold BC wines, great gifts, and expert help from BC Wine Ambassadors. 🍷
Cheers to every kind of dad! 🥂
•
•
•
#BCWine #SaveOnFoods #DirtyLaundryWinery #FathersDay #CheersToDad #sparklingpour #crushing #okanagan #shoplocal #dads #dadsday #winesofbc #buybc #eatdrinkbuybc
@winesofbc @eatdrinkbuybc @saveonfoods

Happy Early Father’s Day!🍷
Raise a glass (or a pint!) to the dads who’ve always had our backs.
From BBQs to dad jokes, life lessons to late-night rescues, Dads deserve more than another pair of socks this Father’s Day.
Shop our early Father’s Day sale today! Get the special man in your life some tasting wine. Select wine is 20% off — use code DADSDAY at check out. Bordello Wine Club Members receive 25% off select wines — no code needed.
Ps. Come by on Father’s Day and we will have an in store surprise for all dads who visit us!
Tap the link in bio to shop the sale and make this Father’s Day one to remember! 🍻
•
•
•
#FathersDay #DirtyLaundryWinery #WineAndBeer #DadsDeserveIt #SipSipHooray #FathersDayGifts #SupportLocal #PatioSeason #BCWine #OkanaganWine #CraftBeerLovers #canada #wine #aummertime

DOUBLE GOLD FOR BORDELLO🥇
We’re incredibly proud to announce that our 2020 Bordello has been awarded Double Gold at the @allcanadianwinechampionships ! This bold, expressive wine continues to be a standout vintage for us and a true reflection of our passion and winery!
We’re also honored to have received additional medals for our 2024 releases:
🥈 Pinot Gris
🥈 Hush Rosé
🥉 Woo Woo Gewürztraminer
A huge thank you to our vineyard and cellar team, @masonspink @chefremington @lucasshawyer_20 your dedication shines in every bottle. As well as a big thank you to our entire team, we would not be here without you all. Cheers to a great season ahead!
•
•
•
#wine #dirtylaundrywinery #BCWine #OkanaganVibes #PatioSeason #WineWithAView #SipSipHooray #SummerlandBC #WineTastingFun #WineLoversUnite #SassySips #DLW #shoplocal #canada #support #patiowine #awards #acwc

Washington Grown, Okanagan Crafted 🍇
We’re beyond excited to release our 2024 vintage, all made possible thanks to our friends south of the border. When our vines were hit hard by the harsh winter, we turned to Washington State. As you all know we were able to source incredible fruit from Coventry Vale Winery and Wyckoff Farms.
We were thrilled to welcome Chris, Adam, and Brandy from Coventry Vale to the Okanagan for the very first time — what a full-circle moment to show them how their grapes are now part of our story.
These 2024 vintage is testament to resilience, collaboration, and craftsmanship. We couldn’t have done it without them! We look forward to your next visit!
•
•
•
#wine #summerland #originwine #winesofbc #2024vintage #okanagan #okanaganwinery #okanaganwinecountry #washingtonstate #shoplocal #canada #support #winewinewine

We just dropped something MAJOR…
DLW REWARDS IS HERE! Yep, loyalty now pays in wine🍷
For the first time ever, you can now EARN POINTS for every dollar you spend at Dirty Laundry Winery — in-store or online (excluding food purchases).
* 1 POINT = $1 SPENT
* Redeem for wine + merch
* Tiers: Base / Silver / Gold / Platinum
Psst. If you already have an account with us, you will be automatically placed into a tier. It’s all based on your purchase history!
Bordello Wine Club Members, you’re already ahead. Start spending and start racking up the point. Not in the Wine Club? No problem, sign up with your email and we’ll gift you 500 POINTS right away.
Time to clean out that wine rack — you’re gonna need the space🍷
•
•
•
#DLWRewards #WinePerks #DirtyLaundryWinery #SipEarnRepeat #summertime #summerland #okanagan #bc #britishcolumbia #canada #supportlocal #winesofbc #winerewards

From the wine shop to the wood-fired pizza oven and the vineyard views — every moment spent at Dirty Laundry Winery is worth sipping slow!✨
Tell us in the comments what your favourite DLW memory is! When will you be back to create even more memories?
•
•
•
#winesofbc #bcwine #okanaganwine #winetasting #okanaganvalley #bottleneckdrive #dirtylaundrywinery #DLW #summerland #drinklocal #vqa #supportlocal #explorebc #shoplocal

After many incredible years of sipping, snapping, and storytelling here at Dirty Laundry, it’s time for me to hang up the DLV wine glass. It’s been an unforgettable ride bringing the sass, sunshine, and sauv blanc to your feeds — thank you for every like, laugh, and emoji-filled DM. I’ve loved every second of helping this winery shine online, and I’m excited to see what’s next — both for me and for DLW. 💋
Cheers to the next chapter — and don’t worry, I’ll still be enjoying a patio visit as a fan. Stay sassy, Summerland.🍇
xoxo, Manpreet

First Time at Dirty Laundry? Here’s What You Really Need to Know 😏
From sassy wine names and vineyard views to pizzas and self-serve wine fridges (yes, really!), my first visit to Dirty Laundry Winery was so much more than a wine tasting.
✔️ $6 tastings
✔️ Cheeky wine history
✔️ Pizza that deserves a standing ovation
✔️ Patio views that make your jaw drop (and your wine taste better)
✔️ Self-serve everything… except the sass — that comes free 😉
Let’s just say, one visit wasn’t enough. Thinking of stopping by this season? I’ve got the full lowdown so you can sip, snack, and soak it all in like a pro.
👉 Tap the link in our bio to read the full post!
.
.
#DirtyLaundryVineyard #BCWine #OkanaganVibes #PatioSeason #WineWithAView #SipSipHooray #SummerlandBC #WineTastingFun #WineLoversUnite #SassySips

Dirty Laundry Fun Fact 🧺
Ever wonder how Dirty Laundry got its name? Spoiler alert: it wasn’t just about clean clothes! 😉
Back in the early 1900s, this property was home to a Chinese laundry business — but legend has it, there was a little extra hospitality offered upstairs. Locals whispered, stories spread, and the name “Dirty Laundry” was born. 🧦
We’ve embraced that colourful past with a wink and a nod — and today, we’re serving up wines full of character, charm, and just the right amount of cheek. 🍷
A little bit playful, a little bit bold… just like our history.
.
.
#DirtyLaundryVineyard #PatioSeason #SipWithAView #OkanaganWine #BCWine #NaramataBench #VineyardViews #WinePatioVibes #SummerSips #WineWithAView #SippinInTheSun #WineryLife #AlFrescoVibes #SunshineAndWine #BCWineries #TasteTheOkanagan #UnwindOutside #PatioVibesOnly #WineLoversParadise #OutdoorTasting #ScenicSips #WeekendWinePlans #SipSipHooray #SummerAtDirtyLaundry #VineyardChillin #WineriesOfInstagram #ExploreNaramata #SassySips #PatioPerfect #CheersToSummer

Summer at Dirty Laundry = Officially ON. 🎉
You asked. We delivered. Our summer lineup is stacked and hotter than a cork in July 🔥 — so grab your crew, your sunnies, and your sass… let’s make this season legendary!
Here’s what’s poppin’ at the winery:
🦞 LOBSTER NIGHTS
Back by demand — and this time, we’re serving up THREE!
July 24 | Aug 7 | Aug 28
Doors at 5:30 PM
$74.95 + GST (includes full lobster dinner — wine not included)
Tickets must be purchased 7 days in advance!
🍹 SANGRIA SUNDAYS
Live music, signature sangria, and new food features weekly? Yes please.
Every Sunday | June 29 – Aug 31
5–7 PM on the patio
Live band every week (check our website for the full lineup!)
First-come, first-served — Wine Club members can reserve!
🎸 BBQ & BLUES
Slow-smoked BBQ + blues with Gerry & The Blueshounds = 🔥
July 31 | 6–8 PM
$59.95 Public | $49.95 Wine Club (wine/beer not included)
⚠️ Tickets close 7 days before — don’t snooze!
🍷 NEW: SIPS & SNACKS
A relaxed, seated tasting featuring 4 wines + chef-curated bites.
Every Mon/Wed/Fri (daily starting mid-June!)
$29.95 (includes tax + tip)
Book at least 24 hours in advance!
🍕 WINE CLUB WEDNESDAY (Members Only)
Wine. Pizza. Live music. Prizes. And a big ol’ thank-you from us.
July 16 & Aug 13 | 6–8 PM
🎟️ FREE for Club Members (but tickets required!)
🎟️ Tickets are LIVE and going fast — visit our website to snag your spots and see all the tasty details.
👀 And keep watching right here for sneak peeks, live updates, and a summer full of sass.
.
.
#DirtyLaundryWinery #SipHappens #OkanaganSummer #LobsterAndWine #SangriaVibes #SipsAndSnacks #WineWithAttitude #SummerlandBC #NoFilterJustFlavour

🚨 New tasting alert! 🚨
We’ve ditched the old and served up something deliciously new — introducing our Sips & Snacks experience! 🍷🍴
This ain’t your grandma’s tasting — it’s a chill, seated patio vibe featuring four fab wines perfectly paired with chef-crafted bites. Casual? Yes. Self-guided? You bet. Freakin’ tasty? Absolutely. 💁♀️
Replacing our Elevated Tasting (RIP, we loved you), this new lineup is here to keep your tastebuds on their toes. Got an old Elevated Tasting certificate? Don’t stress — it totally works for Sips & Snacks.
🗓 Available Mondays, Wednesdays & Fridays
🌞 Daily tastings coming mid-June
💸 $29.95 per guest (tax & tip included)
🦐 May’s pairings include shellfish — let us know about allergies!
📅 Reservations required 24 hours in advance
So if you’re craving sunshine, sips, and snacky goodness — this is your sign. Tag your tasting crew and book it, babes!
.
.
#DirtyLaundryWinery #SipsAndSnacks #SummerlandBC #WineNot #PatioSeason #NewTastingWhoDis

Dirty days are here again! 🍷🌸
The vines are waking up, the sunshine’s stretching longer, and the patio is calling your name. May in Summerland tastes like fresh air, crisp wine, and a little bit of cheeky charm.
Which bottle are you popping first?
.
.
#DirtyLaundryWinery #SummerlandBC #OkanaganWine #BCWine #WineryLife #WineLovers #VineyardViews #SpringSips #PatioSeason #WineTime #SipSipHooray #CheekyCharm #WineWithAView #WineriesOfInstagram #DirtyDays #PopTheCork #WineNot #RoséAllDay #RedWineLovers #WhiteWineLovers #OkanaganValley #WineTasting #VineyardVibes #SipAndSavor #GirlsWhoWine #WineCountryLiving #SpringInTheVineyard #DirtyAndDelicious #WineSeason #SassySips

Raise a Glass to Mom! 🌸🍷
This Mother’s Day, let’s raise a glass to the women who pour so much love into our lives — moms, grandmas, stepmoms, dog moms, and every kind of mom in between🤍
For Mother’s Day, @saveonfoods has something truly special — a heartfelt gift at a beautiful price 💐🍷
Find us in 22 Save-On-Foods stores across B.C., where you’ll discover the largest selection of BCVQA wines, exclusive Mother’s Day deals, and guided support from BC Wine Ambassadors to help you choose the perfect bottle.
@saveonfoods features, In-store tastings, Local wine, and the best type of gifts! Truly the perfect pairing for Mother’s Day!
•
•
•
#BCWine #SparklingPour #SaveOnFoods #WinesofBC #BuyBC #EatDrinkBuyBC
@winesofbc @eatdrinkbuybc @saveonfoods

Mother’s Day plans? We’ve got you covered.
This Sunday, we’re raising a glass to all the mamas, grandmas, step-moms, aunties, mentors, and mother-like legends in our lives!
Join us on the patio for mimosas, majestic views, and that signature Dirty Laundry charm.
We’re celebrating with:
FREE mom-osas for all mom-like figures
10% off all wine shop purchases
No reservations—just walk on in (unless you’re a wine club member… perks, baby).
Bring your favourite mom-figure and let’s make it a Sunday to sip, savour, and spoil!
.
.
#MothersDay2025
#HappyMothersDay
#MothersDayBrunch
#MothersDayCelebration
#CelebrateMom
#WineLover
#WineTasting
#WineryLife
#WineryViews
#SummerlandBC
#OkanaganWine
#BCWine
#WineCountry
#VineyardViews
#SipSipHooray
#PatioSeason
#MimosaTime
#WineAndBrunch
#DirtyLaundryWinery
#WineShop
#WineClubPerks
#WalkInOnly
#NoReservationsNeeded
#CelebrateWithWine
#WineLoversUnite
#CheersToMom
#FamilyTime
#SupportLocal
#ShopLocalBC
#MothersDayEvent

Oh Canada… known for hockey, maple syrup, and now — seriously amazing WINE.
From coast to coast, our home and native land is serving up some sippable stunners, and the Okanagan Valley (ahem, where we proudly pop bottles at Dirty Laundry) is leading the charge. With over 200 wineries and every style of vino you can imagine — bold reds, crisp whites, sassy blends — we’re kind of a big deal.
But wait, there’s more! Ice wine magic in Niagara, bubbly brilliance in Nova Scotia, and boutique beauty in Prince Edward County. Even the Prairies are gettin’ in on the grape game.
Want to know where to go, what to sip, and how to pair it with lobster (or just vibes)? Our latest blog spills the tea (or should we say vino).
Tap the link in bio to read more, and remember — drinking Canadian wine is basically a patriotic duty. Cheers to that!
.
.
#CanadianWine #OkanaganValley #DirtyLaundryVineyard #TrueNorthStrongAndTipsy #WineTourGoals #SupportLocalWineries #SipSipHooray

Only 2 days left to VOTE, darlings!
Voting wraps up April 14th at 3 p.m. for the Best of Penticton, and we’ve been nominated for Best Winery — how deliciously exciting is that?
We’re feeling all the love from our incredible fans, and if you’ve ever sipped, swirled, or danced in our vineyard, we’d love your vote to help us take home the crown (or at least a really fancy ribbon).
We’re honored to be nominated alongside some truly amazing local wineries — but let’s be honest… we’re the only one airing our dirty laundry about it.
Click the link, cast your vote, and let’s make this a vintage year for Dirty Laundry!
Thank you for being part of our wonderfully wild and wine-soaked story.
.
.
#DirtyLaundryWinery #DirtyLaundryVineyard #SummerlandBC #BCWine #OkanaganWine #WineLover #WineTasting #VineyardViews #WineCountry #SipSipHooray #WineTime #OkanaganValley #ExploreBC #DrinkLocal #WineLife #WineryTour #WineOClock #BestOfPenticton #BestOfPenticton2025 #SupportLocal #WineNot #BCWinery #WineLovers #WineStagram #RoséAllDay #WineWednesday #WineriesOfInstagram

Spring is Served at Dirty Laundry! 🍕 🍷
We’re turning up the heat, darlings! Starting April 17th, your favorite scandalous escape is back—ready to wine, dine, and tempt you with something delicious.
Spring Hours (April 17 - June 26)
🍷 Wine shop, tastings, beer bar & patio – 11AM to 5PM
🔥 The Red Iron Grille – 11AM to 4PM (Featuring fresh forno oven pizzas, a mouthwatering smoked meat selection, and more!)
Whether you’re here to sip, savor, or spill some secrets, we’ve got everything you need for the perfect spring escape.
Tag your partners-in-wine & meet us on the patio! 🍇💋
.
.
#DirtyLaundrywinery #SpringFling #RedIronegrille #SipSavorRepeat #DirtyLaundryVineyard #SummerlandBC #OkanaganWine #BCWine #ExploreBC
#BottleneckDrive #WineTasting #WineryLife #OkanaganValley #WineLover
#VisitOkanagan #BCWinery #WineCountry #SipSipHooray #VineyardViews
#WineTourism #SupportLocalBC #WineTime #OkanaganAdventures #BCWineLover
#WineAndDine #ScenicSip #TasteOkanagan #BCVQA #WineNot #OkanaganGetaway

In light of April being BC Wine Month, we’ve come out with something truly unique: Introducing the Half & Half Bottle!🍷
We created this unique wine for those who just can’t decide— Whether you’re a little indecisive or your partner’s a red lover and you’re all about those white— It truly is the perfect pour for both sides of the table!
Come see the unique glass bottles we found and try it for yourself in stores! Available online and in store... while supplies (and patience) last😉🍷
•
•
•
#BCWineMonth #OkanaganWine #BCWine #RedVsWhite #WineWithOptions #WineLovers #OkanaganValley #CanadianWine #HalfAndHalf #WineCompromise #VineyardLife #canada #wine #summerland #bottleneck #wineoftheday #summersoon #summer #okanagan

Meet the Masters Behind the Magic! 🍷
Every great bottle of wine has a story—and ours is one for the books! This past winter threw us a curveball with some of the harshest weather the Okanagan has seen. But did we let that stop us? Absolutely not. Instead, we sourced premium grapes from Washington State—chosen for their incredible quality and nearly identical terroir to ours—ensuring your favorite Dirty Laundry Winery wines maintain their signature character.
Now, let’s talk winemaking (aka the art of turning grapes into pure liquid gold). At the heart of every vintage, you’ll find two passionate masterminds who bring their expertise, creativity, and a little bit of mischief to the mix. Let’s introduce them, shall we?
🍷 Mason Spink – Winemaker
Mason’s been behind the scenes for years, crafting the wines you love with an expert touch. His current obsession? The 2024 Reserve Chardonnay—a stunning balance of barrel influence and bright acidity that showcases just how incredible this vintage is shaping up to be. While we’re sipping whites this spring, Mason’s got his eye on the reds, which are already bursting with deep, jammy flavors and bold structure. (Spoiler alert: they’ll be worth the wait!)
🍇 Chris Remington – Assistant Winemaker
Chris has climbed the ranks from Cellarmaster to Assistant Winemaker, and his love for the craft is palpable. His top pick from our newest releases? The 2024 Riesling—fruit-forward, vibrant, and perfectly balanced between sweetness and acidity. But what really gets him excited? Our white wine program this year, where we’re shaking things up with unique varietals like White Cabernet and a single-varietal Syrah Rosé. (Intrigued? So are we!)
With our 2024 whites rolling out this spring, we can’t wait for you to experience the passion and craftsmanship behind every sip. Come visit us at the winery, raise a glass, and toast to another unforgettable vintage!
Cheers to good wine, great company, and a little bit of mischief. 🍷😉
.
.
#DirtyLaundryWinery #UncorkTheFun

Attention Wine Lovers!
Gone are the days of guessing which wine pairs with your cheese board masterpiece 🍷🧀. The digital age has officially poured into the wine world, and we are here for it! From wine-tracking apps that remember your faves (because let’s be honest, after glass three… who remembers? 🤷♀️) to high-tech gadgets that keep your vino fresh for months, there’s never been a better time to drink smart.
💡 Want to know which apps and gadgets every wine enthusiast needs? Click the link to read our latest blog and level up your sipping game! 👇
https://www.dirtylaundry.ca/exploring-digital-tools-and-smart-technology-for-wine-enthusiasts
.
.
#WineTech #DigitalAgeDrinking #SipSmart #WineLover #TechMeToTheWine #DirtyLaundryVineyard #DirtyLaundryWinery #SummerlandBC #OkanaganWine #BCWine #WineLover #SipSipHooray #WineTech #WineGadgets #WineLife #WineEnthusiast #WineTime #SipHappens #WineNot #SmartSipping #OkanaganValley #WineOClock #WineApps #WineTasting #WinePairing #DrinkLocal #BCWinery #VineyardViews #WineTourism #Uncorked #SipAndSavor

🎉CHEERS TO 50 YEARS!🍷🎉
Today, we raise a glass to our incredible winemaker, who has spent the last 11 years crafting the delicious wines we all know and love at Dirty Laundry Winery!
Your passion, dedication, and talent have brought so much joy to every bottle, and we couldn’t be more grateful.
Thank you for 11 years of amazing wine, amazing memories, and countless cheers! Wishing you a fantastic 50th birthday may it be filled with laughter, great company, and, of course, plenty of wine!
•
•
•
#AgedToPerfection #WinemakerTurns50 #CheersToYou #bcwine #dlw #dirtylaundrywinery #summerland #big50 #cheers #wine #canada #okanaganwine #okanaganvalley #winetasting #bottleneckdrive #vqa #drinklocal #shoplocal #visitpenticton #happybirthday

Cheers to Women in Wine! 🍷💜
This #InternationalWomensDay, we’re celebrating the incredible women who shape Dirty Laundry Winery and the wine industry! Their passion, creativity, and leadership inspire us every day.
To mark the occasion, we’re offering 20% off select wines for one day only! If you’re not a Wine Club member, use code WOMEN at checkout online to save. Members, just sign in—your discount will be automatically applied!
✨ Featured DLW Women & Their Fave Wines:
🍾 Kristen – 2019 CS Brut Rosé
🍷 Alia – 2021 Kay Syrah
🍇 Lisa Marie – 2023 Riesling
🥂 Megan – 2022 Reserved Chardonnay
🔥 Karen – 2020 Bordello
✨ Belinda – 2022 Reserved Chardonnay
🍷 Carol – 2022 Dangerous Liaison
💛 Carolynn – 2019 CS Brut Chardonnay
🎉 Manpreet – 2022 Let’s Get Fizz Rosé
Shop now—sale ends at midnight!
.
.
#WomenInWine #DLW #DirtyLaundryWinery #DLW #WomenInWine #InternationalWomensDay #IWD2025 #WomensDay #CheersToWomen #WomenWhoWine #SipSipHooray #WineLovers #BCWine #OkanaganWine #SummerlandBC #DrinkLocal #SupportWomen #WomenInBusiness #WomenSupportingWomen #EmpoweredWomen #WineSale #WineryLife #RoséAllDay #RedWineLover #WhiteWineLover #SparklingWine #VQA #WineTime #WineTasting #RaiseAGlass

Drake might not like us, but wine lovers sure do. 🍷🔥
.
.
#NotLikeUs #DirtyLaundryWinery #SippingOnWins#superbowlhalftime #okanaganwine #bcwine #winetasting #bottleneckdrive #vqa #winebc #okanaganvalley #kendricklemar

“A hidden gem that feels like Tuscany! 🍷
Thank you, West Coast KVM, for your kind words! From our vineyard views to our patio dining, we love creating an unforgettable experience—delicious pizza and wine included. Cheers to more great memories at Dirty Laundry!
.
.
#DirtyLaundryVineyard #TuscanyVibes #OkanaganWine #WineLover #BCWine #WineCountry #VineyardViews #WineryLife #WineTasting #SipSipHooray #WineAndDine #OkanaganValley #WineryVisit #FoodAndWine #PizzaAndWine #ScenicViews #AlFrescoDining #WineExperience #WineTime #ExploreBC #BCWinery #GoodVibesOnly #VineyardLife #TasteTheOkanagan #WinosUnite #SavorTheMoment #BeautifulDestinations #WineEscape #SummerVibes #WineEnthusiast

NEW BLOG: Sip, Savor, and Get Fortified! 🍷
Think you know wine? Honey, we’re taking things up a notch! Fortified wines aren’t just for grandpa’s liquor cabinet—they’re bold, complex, and absolutely fabulous. From the rich sweetness of Port to the nutty depth of Sherry (and some seriously underrated hidden gems), these wines are here to elevate your sipping game. 🍇
🔥 Higher alcohol? Yes, please.
🍫 Pairs with everything from chocolate to blue cheese.
🍸 Cocktail magic? You bet.
Ready to step up your wine knowledge? Click the link in bio to get the full scoop!
.
.
#DirtyLaundryVineyard #DirtyLaundryWinery #SummerlandBC #OkanaganWine #BCWine #FortifiedWine #PortWine #SherryWine #WineLover #WineTime #WineTasting #SipSipHooray #WineEducation #VineyardViews #DrinkLocal #BCWineCountry #OkanaganValley #WinesOfInstagram #WinePairing #WineAndCheese #SweetWine #TawnyPort #RubyPort #SherryLover #Vermouth #WineCocktails #FoodAndWine #WineIsLife #WineAdventure #Winemaking

🍷 Happy National Syrah Day! 🍷
What will be, will be… but we know one thing for sure—Kay Syrah is the perfect way to celebrate today! 🍇✨
Our bold Syrah is bursting with dark cherry flavours, a touch of pepper, and a smooth finish that keeps you coming back for more! Whether you’re sipping by the fire or pairing it with your favourite dish, Kay Syrah is made for moments like these!
Tag your Syrah-loving friends and raise a glass with us! 🍷 #KaySyrah #NationalSyrahDay #WineLovers #SyrahCelebration #bcwine #summerland #canada #wine #cheese #pairings

Valentine’s may be over, but there’s always a reason to celebrate love, friendship, and great wine! Whether you’re winding down with a bold BC red or toasting to new memories with bubbly BC sparkling, there’s a perfect pour waiting for you.
💡 Tip: Visit @saveonfoods for the world’s largest selection of BC VQA wines, available in 22 stores across the province! Not sure what to pick? Their BC Wine Ambassadors are here to help you find your next favorite bottle. 🍷💘
📍 In-Store Tastings continue with expert pairing ideas to make every moment special.
What’s in your glass this weekend? 🍾✨
#BCWine #LoveInEveryPour #SparklingWine #RedWine #SaveOnFoods @WinesofBC @saveonfoods

Love, Wine & a Little Dirty Fun 💋
Roses are red, wine is too… and tonight, we’re toasting to love, laughter, and a little mischief. 🍷❤️ Whether you’re celebrating with someone special or just indulging in some well-deserved you time, a bottle of Dirty Laundry is the perfect plus-one.
Go ahead—kick off those heels, pour a glass, and let the night take you wherever it pleases. 😉
Happy Valentine’s Day, lovers. 💃🔥
.
.
#DirtyLaundryVineyard #DirtyLaundryWinery #GetALittleDirty #OkanaganWine #BCWine #SummerlandBC #OkanaganValley #VisitOkanagan #WineWithAView #SipHappens #LoveAndWine #SipSipHooray #RoséAllDay #RedWineLover #WhiteWineLover #PerfectPairing #CheersToLove #WineNot #WineTime #Uncorked #ValentinesVibes #ValentineWine #LoveAndWineGoTogether #BeMineWine #DateNightVibes #ToastToLove #RedDressMoment #ValentinesDay2025 #SwoonWorthy #LoveIsInTheAir

A Valentine’s Treat Just for You! 💘
Love is in the air—and in your glass! In honor of Valentine’s Day, we’re treating our Instagram fam to something extra special: exclusive access to our 14% off Valentine’s Sale! We don’t always share these codes here, but this time, we just couldn’t resist.
Non-Members: Use code LOVE at checkout to save 14% on a curated selection of our most delightful wines. Perfect for a romantic dinner, a cozy night in, or a celebration with friends!
Wine Club Members: Simply sign in to your account to enjoy extra savings off your purchase—no code needed!
Your discount will automatically be applied at checkout.
Featured Wines:
🍾 2022 Let’s Get Fizzical & Let’s Get Fizzical Rosé
🥂 2019 Cellar Series Brut Chardonnay & Brut Rosé
🌸 2023 Hush Rosé, Hush White & 2022 Hush Red
❤️ 2020 Bordello & 2022 Dangerous Liaison
🔗 Shop now – this sale ends February 9th! Order today to get your wines in time for Valentine’s Day.
P.S. Want to be the first to get future discount codes? Sign up for our newsletter and never miss out! 🍷💌
.
.
#DirtyLaundryWinery #DirtyLaundryVineyard #SummerlandBC #OkanaganWine #BCWine #CanadianWine #WineryLife #VineyardViews #WineTasting #WineLover #bottleneckdrive #WineTime #RedWine #WhiteWine #RoséAllDay #SparklingWine #WineAndDine #WineCountry #WineLovers #WineLife #WineNot #ValentinesDay #ValentinesGift #LoveIsInTheAir #BeMine #GalentinesDay #LoveAndWine #ValentinesWine #WineAndRoses #CheersToLove

All Aboard the Grand Sommelier Express! 🍷🚂
Get ready for the ultimate wine & scenic adventure! Dirty Laundry Winery is thrilled to be part of this year’s Grand Sommelier Express, a one-of-a-kind train journey through Summerland’s breathtaking countryside.
🚆 Event Details:
📅 June 20 & 21, 2025 | ⏰ 1:30 – 5:00 PM
📍 Kettle Valley Railway Depot, Summerland
🎟️ $169 per person (includes tastings, gourmet apps, dessert reception & more!)
What’s New?
🍷 More time to sip & enjoy!
🪑 Assigned seating so you stay with your crew!
🍰 Sweet dessert reception to end the day on a high note!
🎟️ Bonus Perk: Your ticket includes a Complimentary All-Access Pass for free tastings at Bottleneck Drive wineries from June 19–23!
🚢 Make it a Weekend! Book a VIP Stay at Summerland Waterfront Resort, complete with 2 event tickets, a luxury suite, shuttle service, & a welcome bottle of wine! Call (877) 494-8111 to book.
Don’t miss out—tickets sell fast! Grab yours now and join us for a journey filled with amazing wines, stunning views, and unforgettable memories! 🍷
.
.
#GrandSommelierExpress #KettleValleyRailway #DirtyLaundryWinery #SummerlandBC #WineLovers #OkanaganWine #WineTrain

Meet some of the amazing team members behind Dirty Laundry Vineyard in Summerland! Each person brings their unique skills and passion to creating the exceptional wines and experiences we’re known for. Here’s a quick introduction:
🌟 Mason Spink – Winemaker
The mastermind behind our award-winning wines, Mason’s dedication and expertise shine through every vintage.
🌟 Chris Remmington – Cellar Master
From running kitchens to crafting wine, Chris ensures everything behind the scenes runs smoothly.
🌟 Paul Sawler – VP of Sales & Marketing
Paul leads our branding, sales, and marketing efforts, ensuring our wines reach you wherever you are.
🌟 Lisa Marie Ritchat – Sales & Marketing Manager
Lisa brings 20+ years of hospitality experience to enhance customer satisfaction in every way.
🌟 Belinda Dearborn – Wine Club & E-Commerce Liaison
Belinda loves connecting with wine lovers and sharing her knowledge since 2017.
🌟 Alia Etchison-Bone – Marketing & E-Commerce Coordinator
From the tasting room to marketing, Alia’s passion for wine and sports keeps her busy and creative.
🌟 Adrian Smits – Warehouse Manager
Adrian ensures your wines are shipped with care, and even helps with cellar and patio tasks!
🌟 Kristen Thurlin – Wine Shop Manager
Kristen’s been with us since 2015, overseeing our vibrant wine shop with a love for her dynamic team.
🌟 Manpreet Brar - Social Media Manager
Manpreet is behind the cheeky posts and all the buzz on the Social end of our online presence.
🌟 Dapinder Gill – VP of Finance & Administration
Dapinder brings a lifetime of wine industry experience and a love for our Cellar Series Malbec.
🌟 Carol Jessop – Accounts Receivable
Carol has been part of the DLV family for a decade, combining small-town charm with hard work.
🌟 Karen Coburn - Wine Club Coordinator
Karen joined the team in September 2024. She is assisting in many areas of the winery.
🌟 Carolyn Sudermann – Finance Assistant
A recent addition to the team, Carolyn supports inventory and payables with precision and care.
Each member plays a vital role in making DLV truly special. Head to our website to learn more about everyone and how they contribute to the magic of DLV!

Ready to Build Your Wine Cellar? Let’s Get Cheeky About It!
Starting your own wine cellar isn’t just a project—it’s a love affair with wine! Whether you’re stashing bottles in a basement or showing off a chic wine fridge, it’s all about sipping, savoring, and discovering your style.
Step 1: Define your vibe—are you sipping for fun, flaunting for guests, or investing for the long haul?
Step 2: Pick the perfect spot (no basements? No problem—wine fridges are très chic!).
Step 3: Stock up! From everyday faves to collector’s gems, your cellar should be as versatile as your taste buds.
Start with our Cellar Series Merlot, Malbec, or Fumé Blanc for beginner-friendly, absolutely delicious picks. Trust us—your future self will thank you.
Check out our latest blog for tips on creating a cellar that’s as unique as you are. Let’s get corky!
.
.
.
#WineCellarGoals #OkanaganWine #SipSipHooray #DirtyLaundryVineyard #SipAndSave #winenot #OkanaganWine #HolidayWine #WineAllDay #wineblogger #supportlocal #visitsouthokanagan #southokanagan #visitpenticton #visitsummerland #bottleneckdrive #bcwine #bcwinelife #winebc #vqa #winegifts #winetasting #drinklocal #shoplocal #explorebcwine #explorebc #okanaganvalley #okanaganwine #localwine #pourbcwine #winetrends

Updated Winter Hours, Darling! 🍷
Even the naughtiest need a little winter break, but we’re still here to keep your wine rack stocked and your spirits high! Our wine shop is now open Monday to Friday, 11 am to 4 pm for all your sipping needs.
Closed weekends—we’re saving that energy for April 2025 when the kitchen and beer bar will strut back into action. (Stay tuned for the exact date—we love a good surprise!)
Until then, come in, grab a bottle (or three 😉), and let us keep your glass half full this winter. Cheers!
.
.
.
#WinterWineVibes #SipSipHooray #DirtyLaundryVineyard #SipAndSave #winenot #OkanaganWine #HolidayWine #WineAllDay #wineblogger #supportlocal #visitsouthokanagan #southokanagan #visitpenticton #visitsummerland #bottleneckdrive #bcwine #bcwinelife #winebc #vqa #winegifts #winetasting #drinklocal #shoplocal #explorebcwine #explorebc #okanaganvalley #okanaganwine #localwine #pourbcwine #winetrends

Pop, Fizz, Clink - New year, new cheers! 🥂 Say goodbye to 2024 in style and start 2025 with a glass (or bottle) of something fabulous. Whether you’re popping bubbles at midnight or sipping Port by the fire, we’ve got the perfect pour for your New Year celebrations.
For 3 days only—Dec 31st to Jan 2nd—you can snag exclusive discounts on some of our most toast-worthy wines:
🍾 2022 Let’s Get Fizzical
🍾 2019 Cellar Series Brut Chardonnay
🍷 2020 Bordello
🍷 A Girl In Every Port (375ml)
…and more!
Wine Club Members: Log in for 25% off, no code needed.
Non-Members: Use code 2025 at checkout for 20% off!
Oh, and did we mention? GST is gone (until Feb 14th), so your savings are even sweeter.
Shop the sale exclusively online, fill your cart, and get ready to toast to an unforgettable 2025!

Sip, Sip, Hooray—It’s the Holidays! 🎄
Whether you’re decking the halls or just savoring some you time, we’re raising a glass to YOU this holiday season! 🍷
To our incredible Dirty Laundry fam, thank you for making this year so unforgettable. You’re the reason our story keeps getting better, and we can’t wait to see what magic the new year brings!
No matter how you celebrate, here’s to cozy moments, big laughs, and memories as bold as your favorite glass of wine. Cheers to love, happiness, and a season full of sparkle! 🥂
For those celebrating, Merry Christmas, Happy Holidays, and cheers to an amazing New Year!
.
.
.
#DirtyLaundryVineyard #SipAndSave #winenot #OkanaganWine #HolidayWine #WineAllDay #wineblogger #supportlocal #visitsouthokanagan #southokanagan #visitpenticton #visitsummerland #bottleneckdrive #bcwine #bcwinelife #winebc #vqa #winegifts #winetasting #drinklocal #shoplocal #explorebcwine #explorebc #okanaganvalley #okanaganwine #localwine #pourbcwine #winetrends

Sip, Sparkle & Save! Boxing Day just got bubbly!
From Dec 24–27, snag these sassy wine deals:
✨ 20% off for everyone (Use code: BOXINGDAY)
✨ 25% off for Wine Club Members (Just sign in—easy peasy!)
Featured Faves:
• Let’s Get Fizzical & Fizzical Rosé
• Hush Rosé, Red & White
• Cellar Series Malbec, Brut Chard & More!
Online only—don’t let these festive deals slip away! Stock up, sip big, and slay your wine game.
.
.
.
#BoxingDayBlowout #DirtyLaundryVineyard #SipAndSave #winenot #OkanaganWine #HolidayWine #WineAllDay #wineblogger #supportlocal #visitsouthokanagan #southokanagan #visitpenticton #visitsummerland #bottleneckdrive #bcwine #bcwinelife #winebc #vqa #winegifts #winetasting #drinklocal #shoplocal #explorebcwine #explorebc #okanaganvalley #okanaganwine #localwine #pourbcwine #winetrends

When the team nails the moves and the vibe! 🍷 Bringing the drama to the dance floor with Adele’s Hello 🎵 at our holiday party 🎄 Would you put your dancing skills to the test?
.
.
.
#hellofromtheotherside WorkFamily #HolidayVibes #StaffPartyGoals #DirtyLaundryVineyard #HolidayVibes #winenot #OkanaganWine #HolidayWine #WineAllDay #wineblogger #supportlocal #visitsouthokanagan #southokanagan #visitpenticton #visitsummerland #bottleneckdrive #bcwine #winebc #vqa #winegifts #winetasting #drinklocal #shoplocal #explorebcwine #okanaganvalley #okanaganwine #localwine #pourbcwine #winetrends

Cozy Up with a Holiday Classic! 🍷🎄
As winter settles in and the holidays draw near, there’s nothing like the warmth of a steaming mug of mulled wine to brighten your spirits. This timeless, spiced drink is steeped in history and perfect for any occasion—whether you’re hosting a festive gathering or unwinding by the fire.
Did you know? Mulled wine has been a favorite since Roman times, evolving into cherished traditions like Germany’s Glühwein and Scandinavia’s Glögg.
Want to try it yourself?
Here’s a quick guide:
1️⃣ Start with a fruity red wine like Merlot or Zinfandel.
2️⃣ Add oranges, cinnamon, cloves, star anise, and a splash of brandy (optional).
3️⃣ Simmer gently for 15-20 minutes (don’t boil!)
4️⃣ Strain, garnish, and serve.
🎁 Pro Tip: Mulled wine kits make perfect holiday gifts! Assemble spices, dried oranges, and a recipe card for a thoughtful touch.
For more history, tips, and creative twists (white or rosé mulled wine, anyone?), check out our blog.
What’s your favorite holiday drink? Let us know below! 👇

The Moment We’ve All Been Waiting For!
As of TODAY, GST has been lifted, giving you an extra 5% off countless items—including wine! 🍷
This means more savings just in time for the holidays. Whether you’re stocking up for festive gatherings, planning ahead, or simply treating yourself, now is the perfect time to shop!
📅 Offer valid until February 14, 2025—don’t miss out!
Cheers to extra savings and happy holidays! 🥂
.
.
#DirtyLaundryVineyard #HolidayVibes #nogst #winenot #OkanaganWine #HolidayWine #WineAllDay #wineblogger #supportlocal #visitsouthokanagan #southokanagan #visitpenticton #visitsummerland #bottleneckdrive #bcwine #bcwinelife #winebc #vqa #winegifts #winetasting #drinklocal #shoplocal #explorebcwine #explorebc #okanaganvalley #okanaganwine #localwine #pourbcwine #winetrends

Oh honey, the holidays are creeping up faster than your third glass of Merlot at dinner! Our Holiday Hours are here, so take note:
Tasting Room CLOSED:
• Dec 14th & 15th
• Dec 21st - Jan 6th
Office CLOSED:
• Dec 25th, 26th, and Jan 1st
Pro Tip: If you need to keep your wine rack stocked (and trust us, you do), make sure to place your orders by December 16th if you’re in BC. You’ve still got time to save Christmas one sip at a time. 😉
Cheers to a season full of good wine and great vibes! 🥂
.
.
#DirtyLaundryVineyard #HolidayVibes #CozySeason #winenot #OkanaganWine #DirtyLaundryVineyard #HolidayWine #WineAllDay #wineblogger #supportlocal #visitsouthokanagan #southokanagan #visitpenticton #visitsummerland #bottleneckdrive #bcwine #bcwinelife #winebc #vqa #winegifts #winetasting #drinklocal #shoplocal #explorebcwine #explorebc #okanaganvalley #okanaganwine #localwine #pourbcwine #winetrends

This year, we’re making your holidays even brighter with an incredible giveaway featuring some of our favourite places in town! From Giants Head Brewing to Maple Roch, we’re giving away 3 amazing prize packs you won’t want to miss!
🎉 Grand Prize 🎉 Worth approx $1200!
•A luxurious two-night stay in our stunning Parlour House (Blackout dates apply).
•A complimentary tasting and patio lunch for 4—enjoy beer and wine too!
•A 10% discount on wine shop purchases during your stay.
•A breakfast kit from Maple Roch, including: Maple syrup, granola, hot cake mix, apple chips, and maple lavender tea.
•A $50 Flambé at Home gift card to craft an unforgettable patio dinner.
•From Giants Head Brewing, you’ll also receive a prize pack featuring GH swag, two pint glasses, two 4-packs of beer, and a $20 gift card!
🎁 Second Prize 🎁
•A Dirty Laundry Vineyard swag bag worth $230, featuring:
•Stylish hats for him and her.
•A cozy zip-up hoodie and sweatshirt.
•Christmas wine tumblers to toast the season.
🍷 Third Prize 🍷
•A $100 Dirty Laundry Vineyard gift certificate—perfect for the wine lover in your life.
✨How to Enter:✨
•Follow @dirtylaundryvineyard
•Follow @giantshead_brewing
•Follow @flambeathome
•Follow @mapleroch
•Like the post.
•Tag a friend (or more!) in the comments—each tag counts as an entry!
*Want bonus entries? Share this post to your story and tag us for 5 extra chances to win!
Celebrate the holidays with us and these local gems!*
Cheers to your winning season! 🥂
Contest closes Dec 15th at midnight PST. Winners announced Dec 17th. You must be a natural person and be a legal resident of British Columbia/Alberta. Winners will be randomly selected and contacted via DM by December 16th and listed online. You must have reached the age of majority in your province at the time of entry. There is no purchase necessary to enter or win. This contest is not sponsored, endorsed or administered by or associated with Instagram.

Cyber Monday Extended Sale Alert! 🎉
The holidays are heating up, and we’re turning up the hot savings just for you! 😘
Black Friday was fun, but Cyber Monday? Oh, honey, she’s giving encore energy! That’s right—our 2-Day Cyber Monday Sale is here, running December 1st & 2nd. You’re welcome.
On Sale 💃
Stock up on these stunners:
- 2020 Bordello (sinfully good)
- 2021 Kay’s Syrah (bold & sexy)
- 2022 Dangerous Liaison (because you’re worth it)
- 2022 Hush Red (quietly seductive)
- 2022 Let’s Get Fizzical & Rosé (pop, fizz, repeat)
- 2022 Reserve Chardonnay (rich & indulgent)
- 2023 Hush Rosé (pretty in pink)
Plus! New Merch 👗
From cozy to cheeky, our new merch is everything you’ve been asking for. And with 20% off for Cyber Monday (25% for Wine Club members), you’ll be dressing to impress.
Get in on the Action ✨
- Wine Club Members: Your discount is automatic. No code, no fuss. Just log in and enjoy your 25% off.
- Not a Member? Use code CYBER at checkout for 20% off wines and merch.
But let’s keep it real—normally, this kind of deal is exclusive to our newsletter insiders. So, if you want the VIP treatment next time (and you do), make sure to sign up. You don’t want to be left out, do you?
🔥 Sale ends Dec 2nd at midnight. Don’t keep your cart waiting, darling. It’s not as patient as you.
Shop now and sip🍷

Black Friday at Dirty Laundry: Sip, Save, Slay! 🍷🖤
It’s finally here, darlings—the sale you’ve been dying for! This weekend only, we’re giving you 20% off some of our most seductive wines. From the bold and mysterious 2020 Bordello to the flirty fizz of Let’s Get Fizzical, these deals are here to heat things up. 🔥
✨ Club Members, it gets even hotter: Stack your discount for up to 25% off. (If you’re not a member yet, what are you waiting for? Join the party!)
Pssst… we don’t usually do this! Sales like this are rarely open to the general public, but Black Friday is an exception. Don’t miss out on this special treat, and while you’re at it, sign up for our newsletter so you’re first in line for more exclusive deals and insider perks in the future. 🍷
And because we love to spoil you, we’ve also revamped our Merch Page! Cozy up or accessorize your wine vibes—all merch is 20% off, too.
Here’s your Black Friday lineup—don’t keep them waiting:
🍷 2020 Bordello
🍷 2021 Kay’s Syrah
🍷 2022 Dangerous Liaison
🍷 2022 Hush Red
🍷 2022 Let’s Get Fizzical (and Rosé)
🍷 2022 Reserve Chardonnay
🍷 2023 Hush Rosé
Shop now, sip later—because nothing says Black Friday like a full glass. Cheers to saving, savoring, and slaying this season! 🖤🍷
#DirtyLaundryVineyard #BlackFridayDeals #SipAndSave #WineNot

Mark your calendars, wine lovers! Summerland’s Light Up the Vines is back, and we’re ready to bring the cozy, the sips, and the holiday vibes at Dirty Laundry Vineyard! 🍷🌟
📅 When:
November 30th, December 6th, & December 7th
⏰ Time: 1 PM - 9 PM
What’s on the menu? Only the coziest culinary delights:
🔥 Gourmet pulled pork mac & cheese for purchase (comfort food level: elite).
☕ Port-infused hot chocolate—rich, boozy, and oh-so-holiday perfect (also for purchase).
The Extras: Complimentary wine tastings, festive sales on wine & merch (some exclusions apply), heaters, blankets, and a patio straight out of a Christmas postcard.
Skip the boring holiday shopping and sip, savor, and snag your faves while the vines are glowing. ✨ 🍷 Don’t miss out!
.
.
.
#LightUpTheVines #DirtyLaundryVineyard #HolidayVibes #CozySeason #winenot #OkanaganWine #DirtyLaundryVineyard #HolidayWine #WineAllDay #wineblogger #supportlocal #visitsouthokanagan #southokanagan #visitpenticton #visitsummerland #bottleneckdrive #bcwine #bcwinelife #winebc #vqa #winegifts #winetasting #drinklocal #shoplocal #explorebcwine #explorebc #okanaganvalley #okanaganwine #localwine #pourbcwine #winetrends

New blog: Let’s Talk About Acid… But Make It Wine! 🍋🍷
Here’s a little secret: acidity is the unsung hero of wine. Sure, we all love talking about body and tannins, but it’s acidity that keeps your glass of vino lively, refreshing, and oh-so-balanced.
💡Pro tip: If your mouth waters after a sip, you’re tasting the magic of acidity. It’s what makes a Sauv Blanc zesty, a Pinot Noir food-friendly, and a sparkling wine downright celebratory!
From the crisp whites of the northern Okanagan to the bold reds of the south, acidity is the ultimate balancing act. (And let’s be real—it’s also your best friend when wine meets cheese. 🧀)
So, next time you raise a glass, give a toast to the tart, tangy MVP of the wine world. Cheers to keeping it fresh and fabulous!
.
.
.
#WineTalk #StayCrisp #OkanaganWine #DirtyLaundryVineyard #HolidayWine #WineAllDay #wineblogger #supportlocal #visitsouthokanagan #southokanagan #visitpenticton #visitsummerland #bottleneckdrive #bcwine #bcwinelife #winebc #vqa #winegifts #winetasting #drinklocal #shoplocal #explorebcwine #explorebc #okanaganvalley #okanaganwine #localwine #pourbcwine #okanaganwinery #winetrends

Holiday Shipping Alert! 🚚🎁
Ensure your Dirty Laundry Vineyard favorites arrive in time for the holiday season! Here are our recommended holiday shipping dates:
• Atlantic: order by Friday, Dec 6
• HYZ/HUL: order by Monday, Dec 9
• Prairies: order by Wednesday, Dec 11
• BC: order by Monday, Dec 16
For any expedited orders to Eastern Canada, we can ship AIR SECOND DAY to Toronto, with additional days for final delivery.
🛑 Please note: We will be closed on Dec 25th, 26th, and Jan 1st.
Don’t wait to get your favorite wines—order now and enjoy a worry-free holiday! 🍷🎄
.
.
#HolidayShipping #DirtyLaundryVineyard #HolidayWine #WineAllDay #wineblogger #supportlocal #visitsouthokanagan #southokanagan #visitpenticton #visitsummerland #bottleneckdrive #bcwine #bcwinelife #winebc #vqa #winegifts #winetasting #drinklocal #shoplocal #explorebcwine #explorebc #okanaganvalley #okanaganwine #localwine #pourbcwine #okanaganwinery #winetrends #winepairing

Happy Hallowine, Dirty Laundry fam! 🍷🎃
Tonight’s all about thrills, chills, and a little wine to unwind. Whether you’re in costume or just sipping in style, let our devilishly good wines be your ultimate treat.
Stay safe, stay spooky, and don’t forget to turn up the heat with a glass of your favorite red or white… because a little naughty is always nice at Dirty Laundry. 😈🍷
.
.
#HappyHalloween #SipInStyle #WineAndWicked #TrickOrTreatYourself #WineAllDay #wineblogger #supportlocal #visitsouthokanagan #southokanagan #visitpenticton #visitsummerland #bottleneckdrive #bcwine #bcwinelife #winebc #vqa #winegifts #winetasting #drinklocal #shoplocal #explorebcwine #explorebc #okanaganvalley #okanaganwine #localwine #pourbcwine #okanaganwinery #winetrends #winepairing

New month, new hours, same irresistible wine! 🍷
Starting November 1st, we’re keeping the doors open every day from 11 a.m. to 4 p.m. Whether you’re stocking up or just stopping by for a sip, we’ve got the perfect pour to heat up your day. 🔥
Come get your fix—after all, wine o’clock waits for no one. 😉🍇
#WineAllDay #wineblogger #supportlocal #visitsouthokanagan #southokanagan #visitpenticton #visitsummerland #bottleneckdrive #bcwine #bcwinelife #winebc #vqa #wine #winegifts #winetasting #drinklocal #shoplocal #explorebcwine #explorebc #okanaganvalley #okanaganwine #winelove #localwine #pourbcwine #okanaganwineries #okanaganwinery #winetrends #winepairing #sipsiphooray #fallwine

Halloween is just around the corner, and we’ve already had some spooktacular visitors! 👻🎃
Earlier this October, the @peskellyfamily family brought their skeleton crew for a hauntingly fun tour of Dirty Laundry Vineyard! From sipping on our devilishly good wine to wandering through the vines, it was a fang-tastic time. 🕸️🖤
Take a look at their eerie adventure— because even skeletons know where to find the best wine in town!
Who else is ready for some spooky sips? 🕷️🦇
#HalloweenCountdown #SpookySips #SkeletonCrew #wineblogger #supportlocal #visitsouthokanagan #southokanagan #visitpenticton #visitsummerland #bottleneckdrive #bcwine #winebc #vqa #wine #winegifts #winetasting #drinklocal #shoplocal #explorebcwine #explorebc #okanaganvalley #okanaganwine #winelove #localwine #pourbcwine #okanaganwinery #winetrends #winepairing #sipsiphooray #fallwine

Ever feel like you’re reading a secret code when you check out wine tasting notes? Don’t worry, you’re not alone! 🤔 🍷
We’ve broken it all down for you in our latest blog post— from fruity aromas to that oh-so-smooth finish, we’ve got the scoop on how to decode those wine tasting notes like a pro. Spoiler: it’s way easier than you think!
Head to our blog for the full guide, and next time you pour a glass, you’ll impress even yourself with your tasting skills!
.
.
#wineblogger #supportlocal #visitsouthokanagan #southokanagan #visitpenticton #visitsummerland #bottleneckdrive #bcwine #bcwinelife #winebc #vqa #wine #winegifts #winetasting #drinklocal #shoplocal #explorebcwine #explorebc #okanaganvalley #okanaganwine #winelove #localwine #pourbcwine #okanaganwineries #okanaganwinery #winetrends #winepairing #sipsiphooray #fallwine #WineWisdom

The 2024 grape harvest 🍇 is in full swing here at Dirty Laundry Vineyard, and we couldn’t be more excited!
As you know, this year, we’ve had to make a pivot like others in the industry —bringing in some incredible grapes from Washington to blend with our Okanagan Valley roots. The result? An exciting vintage that we can’t wait to share with you all. Our team is hard at work, turning these beautiful grapes into your next favorite bottle of wine. Stay tuned for more updates from the crush pad! 🍷
.
.
#DirtyLaundryVineyard #Harvest2024 #OkanaganWine #WashingtonGrapes #WineInTheMaking

September may be winding down, but the sun is still out and so are we! ☀️ Come soak up the last of these golden rays with a glass in hand at Dirty Laundry Vineyard.
We’re ready to host you—because who says you can’t keep the fun rolling right into fall? 🍇😉
.
.
#wineblogger #supportlocal #visitsouthokanagan #southokanagan #visitpenticton #visitsummerland #bottleneckdrive #bcwine #bcwinelife #winebc #vqa #wine #winegifts #winetasting #drinklocal #shoplocal #explorebcwine #explorebc #okanaganvalley #okanaganwine #winelove #localwine #pourbcwine #okanaganwineries #okanaganwinery #summerpatio #winetrends #winepairing #sipsiphooray #fallwine

Harvest 2024: A New Adventure Begins! 🍇
This year’s harvest at Dirty Laundry Vineyard is a bit different... After an unexpected cold snap in the Okanagan, we sadly lost most of our grapes. But don’t worry, we’re committed to bringing you the wines you love!
Our solution? We’ve partnered with a trusted grower in Washington State to source high-quality grapes, ensuring our wine maintains the same exceptional quality you know and love. Check out these behind-the-scenes shots of Mason and the team visiting Coventry Vale!
While it’s tough not to use our beloved Okanagan grapes this season, we’re excited for this new adventure and can’t wait to share these new vintages with you. Cheers to embracing challenges and creating something special!
Have any questions about this year’s journey? We’d love to hear from you!
.
.
#Harvest2024 #WineJourney #BehindTheScenes #DirtyLaundryVineyard #NewAdventures #WashingtonWine #WineLovers #Winemaking #SummerlandWinery #OkanaganWine

Discover the Perfect Pairing: Okanagan Wines and Lifestyle!
The Okanagan Valley isn’t just known for its breathtaking landscapes—it’s a region where wellness, relaxation, and outdoor adventure come together with exceptional wines. Whether you’re winding down by the lake, enjoying a cozy evening by the fire, or embracing an active day outdoors, there’s an Okanagan wine to enhance every experience.
🌿 Wellness and Wine: From organic wines perfect for post-yoga relaxation to light whites like our Sauvignon Blanc and Riesling that complement healthy meals, our wines fit seamlessly into a wellness-focused lifestyle.
🏖️ Relaxation and Rosé: Picture lazy summer afternoons with a glass of our Hush Rosé or cozy winter nights with a robust Bordello by the fire—our wines elevate every moment of tranquility.
🧗♀️Adventure Awaits: Crisp whites, refreshing rosés, and celebratory sparkling wines are ideal companions for Okanagan adventures, whether you’re picnicking by the beach or toasting to a sunset hike.
Join us on a journey to explore how Dirty Laundry’s diverse range of wines pairs perfectly with every aspect of the Okanagan lifestyle!
Visit our blog to learn more. Link in bio. 🍷
.
.
#DirtyLaundryVineyard #OkanaganWine #WineAndWellness #ExploreOkanagan #WineLovers #RoséAllDay #WineCountry #VineyardViews #WineAdventure #bottleneckdrive

⭐️⭐️⭐️⭐️⭐️ Oh, stop it—you’re making us blush! Huge shoutout to one of our loyal visitors for the fabulous 5-star review on Google! We’re thrilled you loved our wine, our views, and our whole vibe here at Dirty Laundry Vineyard.
We’re not saying we’re the best, but... well, if the cork fits! 🍷💁♀️ Keep those amazing reviews coming, and we’ll keep the wine flowing!
.
.
#wineblogger #supportlocal #visitsouthokanagan #southokanagan #visitpenticton #visitsummerland #bottleneckdrive #bcwine #bcwinelife #winebc #vqa #wine #winegifts #winetasting #drinklocal #shoplocal #explorebcwine #explorebc #okanaganvalley #okanaganwine #winelove #localwine #pourbcwine #okanaganwineries #okanaganwinery #summerpatio #winetrends #winepairing #sipsiphooray #fallwine

🍇 New Fall Hours Alert! 🍂
As the leaves change, so do we! Starting September 2nd, we’re shaking things up with our new fall hours.
🍷 Wineshop, Patio and Beer – 7 days a week 11am to 5pm
🍕 Pizza is open Thursday to Monday 11am to 4pm
Please note on Tuesdays and Wednesdays we will have Charcuterie available 🧀 🍷 🫒
Because nothing says cozy sweater weather like a glass of wine at Dirty Laundry Vineyard. Whether you’re a weekday wanderer or a weekend warrior, we’ve got you covered with plenty of time to sip, swirl, and savor the season.
So grab your crew and join us—because the only thing falling faster than the leaves is the wine in your glass. Cheers to autumn adventures at Dirty Laundry!
.
.
#wineblogger #supportlocal #visitsouthokanagan #southokanagan #visitpenticton #visitsummerland #bottleneckdrive #bcwine #bcwinelife #winebc #vqa #wine #winegifts #winetasting #drinklocal #shoplocal #explorebcwine #explorebc #okanaganvalley #okanaganwine #winelove #localwine #pourbcwine #okanaganwineries #okanaganwinery #summerpatio #winetrends #winepairing #sipsiphooray #fallwine

Come for the Wine, Stay for the Food!
Sure, our wine might be the star of the show, but have you experienced what’s coming out of our kitchen? 🤤 From mouthwatering bites to full-on feasts, we’ve got everything you need to turn your visit into a full-blown flavour fest.
So, bring your appetite and let’s do this! Sip, savor, and snack your way through the best of what Dirty Laundry has to offer. Because around here, the only thing better than our wine is pairing it with some seriously delicious eats. 🍇🍕🥂
You in? We thought so! 😉
.
.
#wineblogger #supportlocal #visitsouthokanagan #southokanagan #visitpenticton #visitsummerland #bottleneckdrive #bcwine #bcwinelife #winebc #vqa #wine #winegifts #winetasting #drinklocal #shoplocal #explorebcwine #explorebc #okanaganvalley #okanaganwine #winelove #localwine #pourbcwine #okanaganwineries #okanaganwinery #summerpatio #winetrends #winepairing #sipsiphooray #eatdrinkbuybc

🍷☀️ Raise your glass to the third last *Sangria Sunday* of the summer! We’re serving up sunshine, sass, and seriously good vibes today at Dirty Laundry Vineyard. Whether you’re soaking in the summer rays or sipping on our perfectly chilled sangria, Sundays have never tasted this sweet. 🌞💃
So grab your crew, and let’s toast to making the most of this gorgeous weather and the last sips of summer! Cheers to a day that’s as bold and bubbly as our sangria. See you on the patio! 🥂
.
.
#wineblogger #supportlocal #visitsouthokanagan #southokanagan #visitpenticton #visitsummerland #bottleneckdrive #bcwine #bcwinelife #winebc #vqa #wine #winegifts #winetasting #drinklocal #shoplocal #explorebcwine #explorebc #okanaganvalley #okanaganwine #winelove #localwine #pourbcwine #okanaganwineries #okanaganwinery #summerpatio #winetrends #winepairing #sipsiphooray #sangriasundays

We’re thrilled to share a recipe from the talented Chef Barrie of Fernie Catering Co. This recipe will have you feeling those summer vibes with every bite. We couldn’t be more excited to collaborate with her again and showcase her culinary creations. If you haven’t experienced Fernie Catering Co. yet, consider this your delicious introduction!
Summer Kale Salad with Creamy Anchovy Dressing:
Ingredients:
200g Asparagus, tough ends trimmed
200g Baby Kale
50g Toasted Breadcrumbs
40g Parmigiano
1 tsp Finely Grated Lemon Zest
Kosher Salt & Freshly Ground Black Pepper
Dried Chili Flakes
¼ cup Lightly Packed Mint Leaves (Julienned)
Extra-Virgin Olive Oil
Instructions:
Prepare the Veggies: Cut asparagus on a sharp angle into very thin slices. Massage the baby kale with a bit of olive oil to soften it.
Mix the Salad: In a large bowl, toss the kale, asparagus, mint, toasted breadcrumbs, Parmigiano, and lemon zest.
Season: Add kosher salt, a generous crack of black pepper, and a pinch of dried chili flakes. Adjust the flavors to your liking—more salt, pepper, or even a squeeze of lemon juice if you’re feeling zesty!
Creamy Anchovy Dressing:
Ingredients:
20g Garlic
30g Anchovies
2 Tbsp Red Wine Vinegar
1 Egg Yolk
1 tsp Dijon Mustard
150ml Olive Oil
1 Tbsp Lemon Juice
Salt & Pepper
Instructions:
Blend It Up: In a blender, combine egg yolk, garlic, anchovies, Dijon mustard, and red wine vinegar. Blend until the mixture is white and frothy.
Emulsify: While the blender is on low, slowly drizzle in the olive oil until the dressing is smooth and creamy.
Finish: Stir in lemon juice and season with salt and pepper to taste.
This salad is as refreshing as a summer breeze and pairs wonderfully with our Pinot Gris. The zesty fruit and crisp acidity of the wine perfectly complement the creamy dressing and the fresh, vibrant greens. Whether you’re planning a light lunch, a picnic, or a casual dinner, this pairing is sure to impress!
A big thank you to Chef Barrie and Fernie Catering Co. for this fantastic recipe. Click link in bio to learn more about Chef Barrie!

We have FANTASTIC news! After a long hiatus, we are THRILLED to announce that we can once again ship our tasty wines to Alberta! 🎉🍇🚚
We know you’ve been eagerly awaiting this moment, and we can’t wait to get our award-winning wines back into your hands as quickly as possible.
.
.
#wineblogger #supportlocal #visitsouthokanagan #southokanagan #visitpenticton #visitsummerland #bottleneckdrive #bcwine #bcwinelife #winebc #vqa #wine #winegifts #winetasting #drinklocal #shoplocal #explorebcwine #explorebc #okanaganvalley #okanaganwine #winelove #localwine #pourbcwine #okanaganwineries #okanaganwinery #summerpatio #winetrends #winepairing #wineClub #sipsiphooray

Not in the mood for wine or beer? No problem! ☕️ Visit us at Dirty Laundry Vineyard and enjoy a perfectly brewed espresso while soaking in the stunning Summerland views. Because your time here should be just the way you like it!
.
.
#wineblogger #supportlocal #visitsouthokanagan #southokanagan #visitpenticton #visitsummerland #bottleneckdrive #bcwine #bcwinelife #winebc #vqa #wine #winegifts #winetasting #drinklocal #shoplocal #explorebcwine #explorebc #okanaganvalley #okanaganwine #winelove #localwine #pourbcwine #okanaganwineries #okanaganwinery #summerpatio #winetrends #winepairing #wineClub #sipsiphooray

“Who knew running a vineyard could be so RACE-y? 😏
We had a blast hosting The Amazing Race Canada at Dirty Laundry Vineyard! Cheers to unforgettable adventures and a bit of cheeky fun! 🍷
#AmazingRaceCanada

Get ready to ride the waves of saving with our Beachy Wine Sale! From July 23rd to July 28th, we’re bringing you lake vibes and a splashes of savings with 10% off select bottles.
It’s the perfect time to stock up on your favourite wines and toast to this hot weather!
🌊Say Aloha to Our Sale Wines🌊
2023 Hush White
2022 Hush Rose
2023 Riesling
2023 Pinot Gris
2022 Let’s Get Fizzical
2022 Let’s Get Fizzical Rosé
Bubble Entendre - Blanc
2020 Hush Red
🏝️How to Grab Your Discount🏝️
Visit our website with the link in bio! (Sale is ONLINE ONLY)
Select your favourite beachy bottles out of a select list.
Use code ALOHA10 at checkout to enjoy 10% off your purchase!
Don’t miss out on this week long sale! Sip and celebrate summer with our tasty selection of wines.
🌴🏖️ See you at the beach! (or the winery!)🌺🍷

🚨 Exciting News! 🚨 DLV is making a splash on The Amazing Race Canada!
🌟 Tune in to the upcoming episode when teams air out their dirty laundry as they press or undress. Catch all the action and see our stunning vineyard in the spotlight.
The episode that showcases Dirty Laundry Vineyard, airs July 23rd 2024. Don’t miss it! 🍇🎬
.
.
#AmazingRaceCanada

Have You Ever Thought About Joining Our Bordello Wine Club? Are you ready to elevate your wine journey to the next level?
Join the our Bordello Wine Club and discover numerous perks, member exclusive experiences, and of course incredible wines!
🍇Why Join the Bordello Club?🍇
As a member of the Bordello Club, you’ll enjoy tons of benefits designed to make every sip of our wine even more special:
- Booking Reservations on our award winning patio.
-10% Discount on all non-scheduled purchases.
-$15 Gift Card for each club shipment picked up at our wine shop.
- Fully Customizable wine choices.
- Free Shipping on 12 or more bottles.
- Complimentary Wine Shop Tastings for you and your guests.
- Discounts off our Elevated Tasting Experience.
🍷Choose Your Perfect Level 🍷
Blush Level
Boudoir Level
Madam Level
.
.
.
#wineblogger #supportlocal #visitsouthokanagan #southokanagan #visitpenticton #visitsummerland #bottleneckdrive #bcwine #bcwinelife #winebc #vqa #wine #winegifts #winetasting #drinklocal #shoplocal #explorebcwine #explorebc #okanaganvalley #okanaganwine #winelove #localwine #pourbcwine #okanaganwineries #okanaganwinery #summerpatio #winetrends #winepairing #wineClub #sipsiphooray

Frosé all day? Yes way! 🍷✨ Sipping our way through summer at Dirty Laundry Winery. Come for the views, stay for the Frosé!
.
.
#wineblogger #supportlocal #visitsouthokanagan #visitpenticton #visitsummerland #bottleneckdrive #bcwine #bcwinelife #winebc #vqa #wine #winegifts #winetasting #drinklocal #shoplocal #explorebcwine #explorebc #okanaganvalley #okanaganwine #winelove #localwine #pourbcwine #okanaganwineries #okanaganwinery #summerpatio #winetrends #winepairing #froséallday #frosé #sipsiphooray

Feeling flirty with our award-winning Gamay at Dirty Laundry Winery in Summerland, BC.🍷 Sip, savor, and embrace the sass – because life’s too short for anything but the best!
Find our Gamay at:
@martinstreetliquor
@bcwineinfo
@angryotterliquor (Cherry Lane location)
@zias.stonehouse
.
.
#wineblogger #supportlocal #visitsouthokanagan #southokanagan #visitpenticton #visitsummerland #bottleneckdrive #bcwine #bcwinelife #winebc #vqa #wine #winegifts #winetasting #drinklocal #shoplocal #explorebcwine #explorebc #okanaganvalley #okanaganwine #winelove #localwine #pourbcwine #okanaganwineries #okanaganwinery #summerpatio #winetrends #winepairing #wineawards #sipsiphooray

Ready to sip, savor, and soak up the Summerland sun? 🌞🍷 Our patio is calling your name! Join us at Dirty Laundry Winery for an unforgettable experience where the wine is as bold as the views.
Grab your friends, your favorite shades, and let’s make some memories. Cheers!
.
.
.
#wineblogger #supportlocal #visitsouthokanagan #southokanagan #visitpenticton #visitsummerland #bottleneckdrive #bcwine #bcwinelife #winebc #vqa #wine #winegifts #winetasting #drinklocal #shoplocal #explorebcwine #explorebc #okanaganvalley #okanaganwine #winelove #localwine #pourbcwine #okanaganwineries #okanaganwinery #summerpatio #winetrends #winepairing #sipsiphooray #bctop50

Join us for live music every Sunday, all summer long! From June 30th to September 1st, we are offering complimentary live music every Sunday night from 5:00-7:00 PM.
Enjoy a variety of Dirty Laundry signature Sangrias throughout the summer, while listening to fantastic musicians performing various styles of music. Each Sunday night we will also have a delicious feature from our kitchen!
Sunday Live Music Details:
Dates: Every Sunday from June 30th to September 1st
Time: 5:00 PM - 7:00 PM
Seating: First come, first served (Wine club members can book table reservations in advance)
Schedule of Performances:
Sunday, June 30th: Uncorked
Extensive playlist featuring Fleetwood Mac, Van Morrison, Sheryl Crowe, Bruce Springsteen, the Eagles, Steve Miller Band, Bob Seger, Eric Clapton, Bob Marley, Steppenwolf, The Rolling Stones, Nickelback, Florence and the Machine, and more.
Sunday, July 7th: Dennis Edward & Jay Porteous
Performing hits from the Eagles, Beatles, Stones, along with original music and some country hits.
Sunday, July 14th: Maiya Robbie
Interdisciplinary artist and musician known for her work as a singer/songwriter and a founding member of Shane Koyczan and the Short Story Long.
Sunday, July 21st: James Wilson
Solo vocalist and guitarist featuring rock, folk, and original music.
Sunday, July 28th: Tristan Telle
Local musician featuring folk and pop with a little bit of everything.
Sunday, August 4th: Melomaniacs
A large repertoire of cover songs from the 60’s to the 2000’s including pop, classic rock, blues, some jazz, and bluegrass tunes.
Sunday, August 11th: Just US Okanagan
A live duo performing a medley of hits, perfect for a chill Sunday afternoon.
Sunday, August 18th: Hellard & Hirth
Easy listening hits with a special song written just for DLV.
Sunday, August 25th: Maiya Robbie
Interdisciplinary artist and musician known for her work as a singer/songwriter and a founding member of Shane Koyczan and the Short Story Long.
Sunday, September 1st: Tristan Telle
Local musician featuring folk and pop with a little bit of everything.

🍷🎉 Let the long weekend festivities begin with a dance and a glass at Dirty Laundry Winery! Open ‘til 7pm Fri-Sun, with pizza until 6pm and tasting bar until 5pm. Cheers to a weekend filled with fun and great wine! 💃🕺
.
.
.
#DirtyLaundryWinery #LongWeekendDance #summerland #canadaday #longweekend #winery #wine #dance #tasty #southokanagan #visitpenticton #visitsummerland #bottleneckdrive #bcwine #bcwinelife #winebc #vqa #wine #winegifts #winetasting #drinklocal #shoplocal

🍷 **New Summer Hours Alert!** 🍷
Hey, wine lovers! We’re thrilled to announce our new summer hours at Dirty Laundry Winery in beautiful Summerland, B.C.! 🌞
Effective immediately:
🕘 Monday to Thursday: 11 AM - 5 PM
🕘 Friday to Sunday: 11 AM - 7 PM (last kitchen order accepted until 6pm)
Join us on our stunning patio to sip on your favorite wines and enjoy delicious food. 🍇🍴 Whether you’re looking for a relaxing afternoon or a fun evening out, we’ve got the perfect spot for you.
🍷 Indulge in our finest wines
🍽️ Delight in our delectable food menu
🎶 Enjoy live music every Sunday 5-7pm
🍹 Special Sangria Sundays
Bring your friends and family, and make the most of these longer, warmer days. We can’t wait to see you!
.
.
#wineblogger #supportlocal #visitsouthokanagan #southokanagan #visitpenticton #visitsummerland #bottleneckdrive #bcwine #bcwinelife #winebc #vqa #wine #winegifts #winetasting #drinklocal #shoplocal #explorebcwine #explorebc #okanaganvalley #okanaganwine #winelove #localwine #pourbcwine #okanaganwineries #okanaganwinery #summerpatio #winetrends #winepairing #wineawards #bctop50

Still riding that Wine of The Year high! Don’t miss your chance to get your hands on our 2022 Gamay…it is flying off the shelves 🍷 ✈️
.
.
#wineblogger #supportlocal #visitsouthokanagan #southokanagan #visitpenticton #visitsummerland #bottleneckdrive #bcwine #bcwinelife #winebc #vqa #wine #winegifts #winetasting #drinklocal #shoplocal #explorebcwine #explorebc #okanaganvalley #okanaganwine #winelove #localwine #pourbcwine #okanaganwineries #okanaganwinery #summerpatio #winepairing #wineawards #bctop50 #wineoftheyear

This Sunday we are offering complimentary flights of beer for all the dad like figures 🧑
Our patio has so much to offer - wine, pizza, smoked meats and more. Come by tomorrow, we are open 11-5pm.
Friendly reminder - we do not require or accept reservations.
.
.
.
#wineblogger #supportlocal #visitsouthokanagan #visitpenticton #visitsummerland #bottleneckdrive #bcwine #bcwinelife #winebc #vqa #wine #winegifts #winetasting #drinklocal #shoplocal #explorebcwine #explorebc #okanaganvalley #okanaganwine #winelove #localwine #pourbcwine #okanaganwineries #okanaganwinery #summerpatio #winetrends #winepairing #wineawards #bctop50 #fathersday

We are so incredibly grateful to be the recipient of Wine of the Year for our 2022 Cellar Series Gamay Noir.
Nearly 370 BC wines from 90 producers were blind tasted and scored individually by a highly
respected group of judges. The scores were then averaged to produce the list of BC’s TOP 50 wines
including the highest score named the Wine of the Year.
We want to congratulate all of the TOP 50 wines, it is truly an honour to be recognized alongside the best of the best. 👏🏽
Thank you to @okanaganwinefestival for an amazing evening of wonderful wines, and for always celebrating what BC has to offer.
.
.
#wineblogger #supportlocal #visitsouthokanagan #southokanagan #visitpenticton #visitsummerland #bottleneckdrive #bcwine #bcwinelife #winebc #vqa #wine #winegifts #winetasting #drinklocal #shoplocal #explorebcwine #explorebc #okanaganvalley #okanaganwine #winelove #localwine #pourbcwine #okanaganwineries #okanaganwinery #summerpatio #winetrends #winepairing #wineawards #bctop50

Free tastings for team jerseys & Action Fest t-shirts this weekend only!!!!
We are thrilled to announce that as the 38th Annual Summerland Action Festival kicks off, Dirty Laundry Vineyard will be offering complimentary wine tastings to all guests wearing a team jersey or an Action Fest T-shirt!
Don’t forget to tag us for extra clout! ⚾️ 🍷
.
.
#wineblogger #supportlocal #visitsouthokanagan #southokanagan #visitpenticton #visitsummerland #bottleneckdrive #bcwine #bcwinelife #winebc #vqa #wine #winegifts #winetasting #drinklocal #shoplocal #explorebcwine #explorebc #okanaganvalley #okanaganwine #winelove #localwine #pourbcwine #okanaganwineries #okanaganwinery #summerpatio #winetrends #winepairing #actionfest #baseball

The best wine to drink with cheese should be one that complements the cheese and vice versa, balancing each other’s flavours rather than overpowering one another.
In finding the perfect cheese and wine pairing, consider the following:
1. The Characteristics of the Cheese
2. Match Intensity
3. Texture Pairing
4. Consider Flavour Profile
5. Balance is Key
Now that we’ve covered the basics, let’s explore some classic wine and cheese pairings that are sure to impress. Link in bio.
.
.
#wineblogger #supportlocal #visitsouthokanagan #southokanagan #visitpenticton #visitsummerland #bottleneckdrive #bcwine #bcwinelife #winebc #vqa #wine #winegifts #winetasting #drinklocal #shoplocal #explorebcwine #explorebc #okanaganvalley #okanaganwine #winelove #localwine #pourbcwine #okanaganwineries #okanaganwinery #summerpatio #winetrends #recipes #winepairing

May showers bring June flowers right?! 🍷 ☔️ 🌸 Our Wine Shop is open 7 days a week!
.
.
#wineblogger #supportlocal #visitsouthokanagan #southokanagan #visitpenticton #visitsummerland #bottleneckdrive #bcwine #bcwinelife #winebc #vqa #wine #winegifts #winetasting #drinklocal #shoplocal #explorebcwine #explorebc #okanaganvalley #okanaganwine #winelove #localwine #pourbcwine #okanaganwineries #okanaganwinery #summerpatio #winetrends #recipes #winepairing

This weekend, we want to celebrate all mother figures in our lives. Whether you’re a biological mother, stepmother, adoptive mother, foster mother, grandmother, or any other nurturing presence, your love, guidance, and support are invaluable.
We are offering complimentary mimosas to all mothers on May 12, and, starting today, mothers who visit can enter to win one of three draw prizes (winners will be notified by email on May 13)!
.
.
#wineblogger #supportlocal #visitsouthokanagan #southokanagan #visitpenticton #visitsummerland #bottleneckdrive #bcwine #bcwinelife #winebc #vqa #wine #winegifts #winetasting #drinklocal #shoplocal #explorebcwine #explorebc #okanaganvalley #okanaganwine #winelove #localwine #pourbcwine #okanaganwineries #okanaganwinery #summerpatio #winetrends #recipes #winepairing #mothersday

New hours‼️ The Red Iron Grille is now open 7 days a week from 11-4pm!
Enjoy drinks and bites our stunning patio ☀️
Some of our menu items include:
Pizza 🍕 of course
Assortment of smoked meat dishes
Kids menu
Salads 🥗
Breadsticks
Bao buns
Sandwiches and more!

The patio is OPEN for the season and we are FINE!! No really, we are actually more than fine….we are excited, elated, jumping for joy to welcome you!
Hours:
Wineshop 11-5pm everyday
Patio 11-4pm Thurs to Sun
.
.
#wineblogger #supportlocal #visitsouthokanagan #southokanagan #visitpenticton #visitsummerland #bottleneckdrive #bcwine #bcwinelife #winebc #vqa #wine #winegifts #winetasting #drinklocal #shoplocal #explorebcwine #explorebc #okanaganvalley #okanaganwine #winelove #spring #localwine #pourbcwine #okanaganwineries #okanaganwinery #summerpatio #winetrends #recipes #winepairing

We can’t wait to welcome you back to our award-winning patio!
Our wineshop is now open 7 days a week for tastings and wine purchases from 11am to 5pm.
Get excited for pizza, because the Red Iron Grille reopens for the season with spring hours on April 18th, Thursday to Sunday, 11am to 4pm.
.
.
#wineblogger #supportlocal #visitsouthokanagan #southokanagan #visitpenticton #visitsummerland #bottleneckdrive #bcwine #bcwinelife #winebc #vqa #wine #winegifts #winetasting #drinklocal #shoplocal #explorebcwine #explorebc #okanaganvalley #okanaganwine #winelove #spring #localwine #pourbcwine #okanaganwineries #okanaganwinery #summerpatio #winetrends #recipes #winepairing
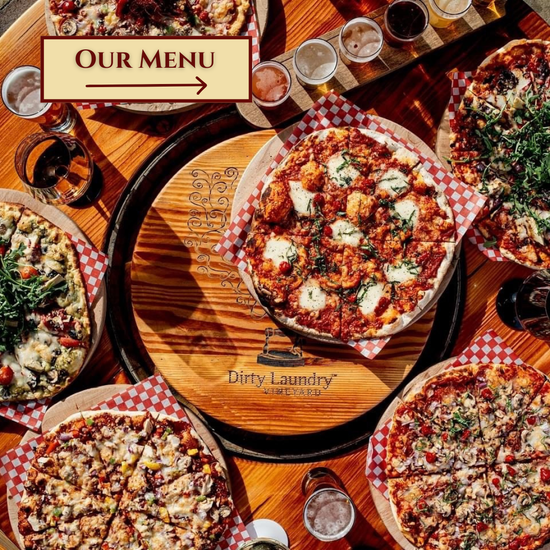

Our 2024 Washington Grown, Okanagan Crafted Vintage Is Here
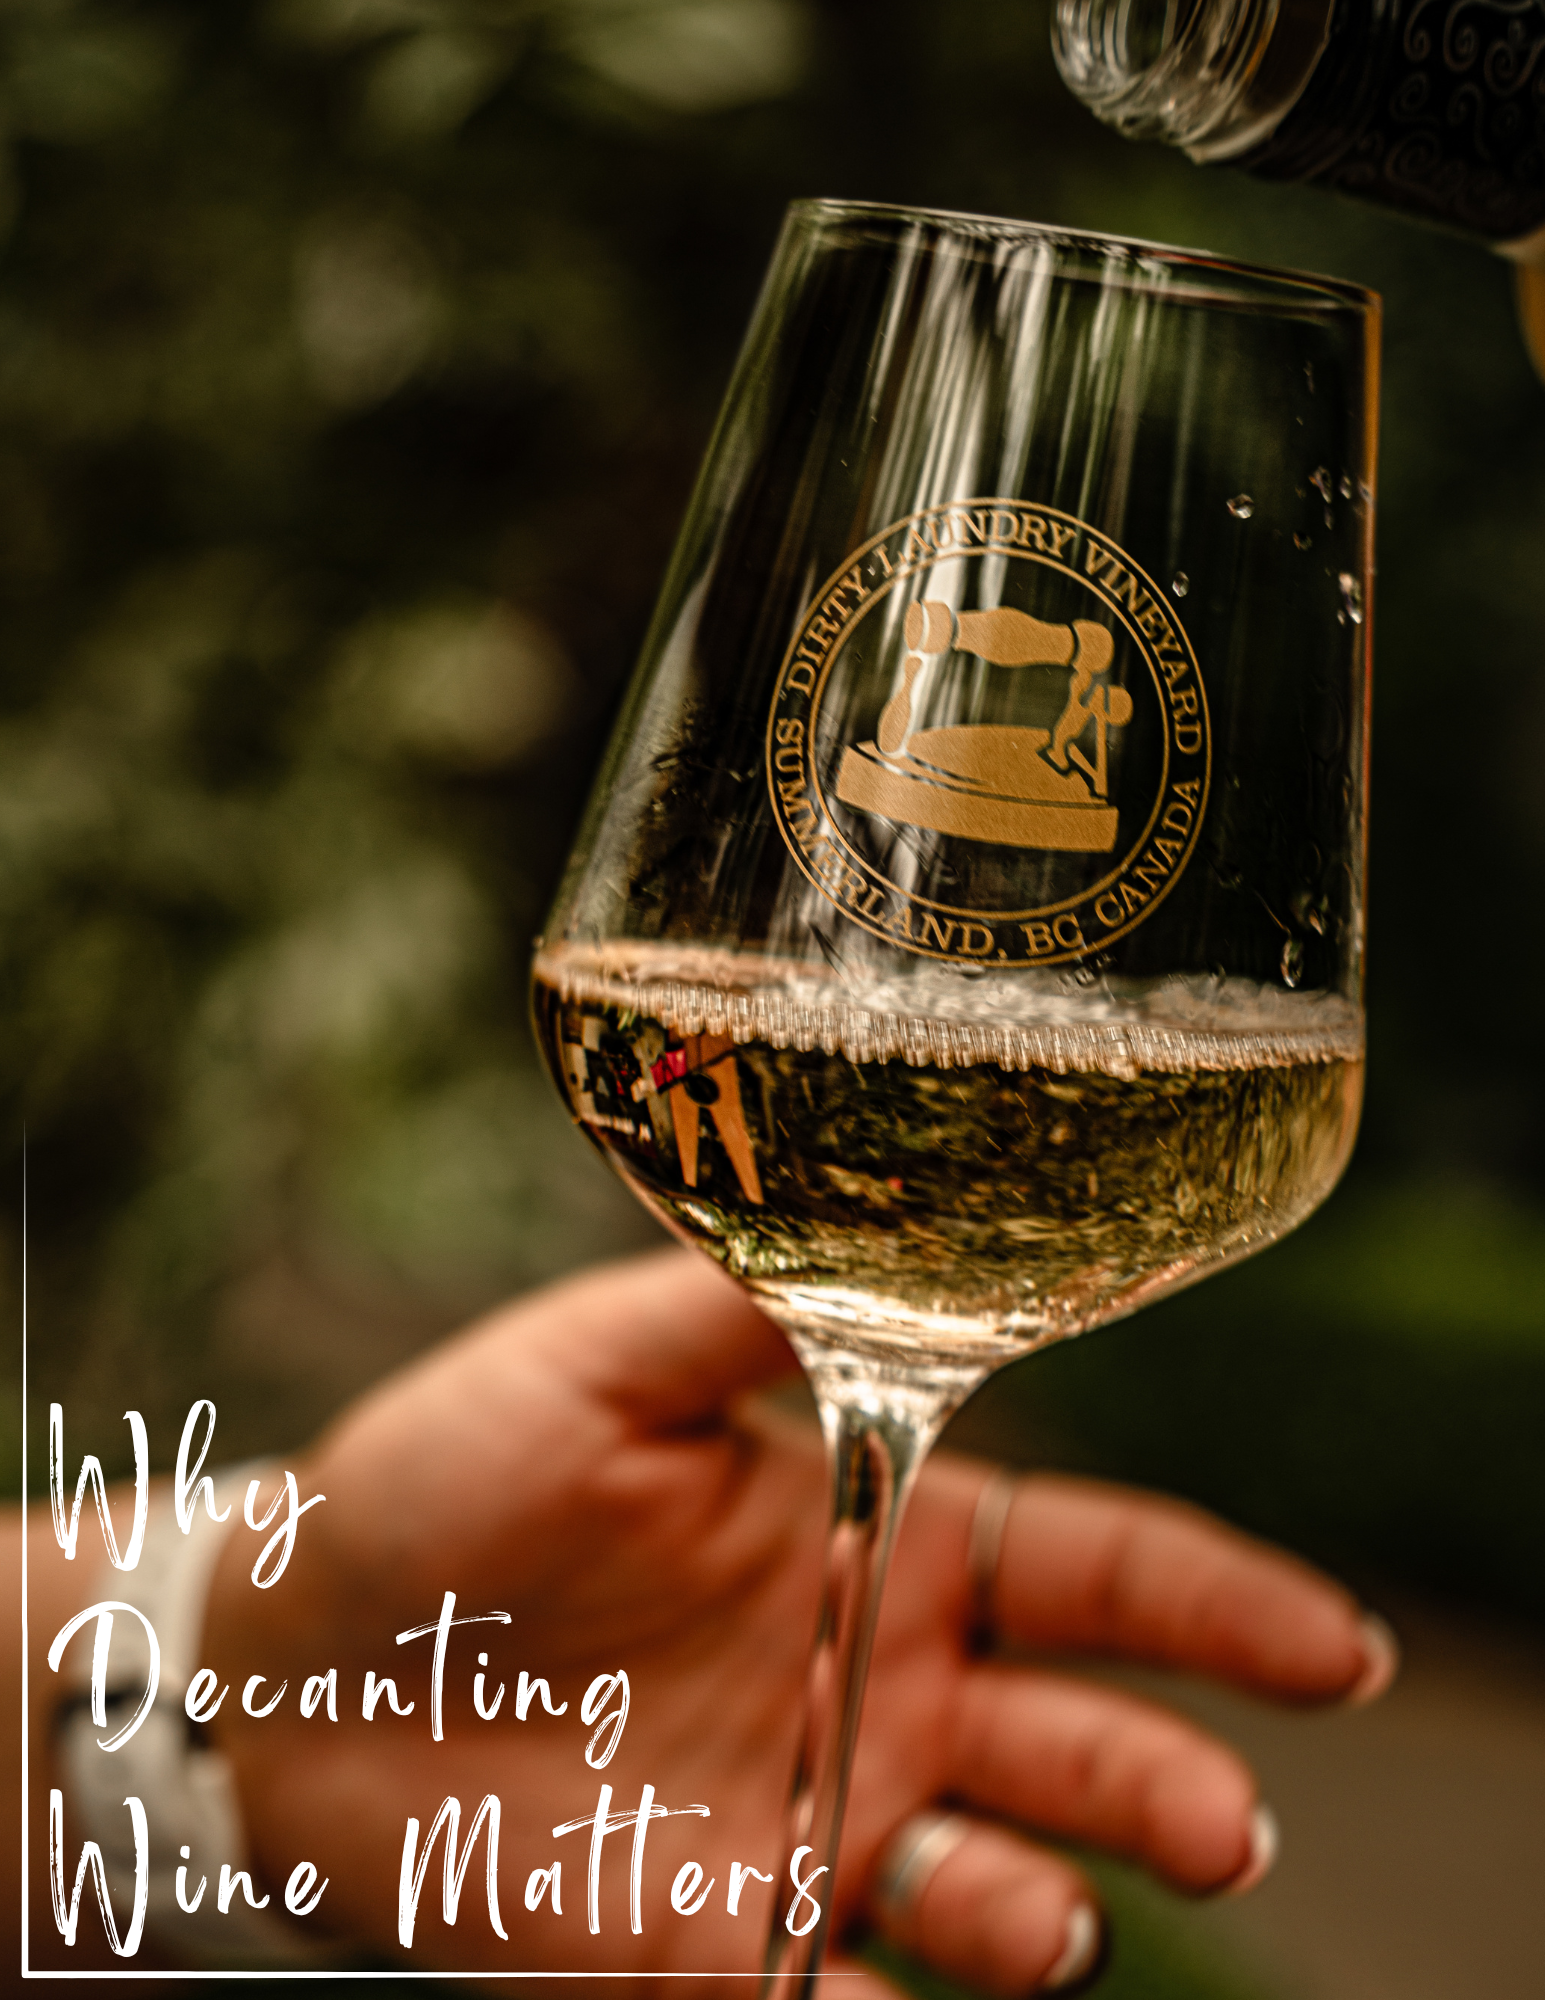
If you’ve ever dined at a fine restaurant or visited a winery, you’ve probably seen someone slowly pouring wine into a fancy-looking glass vessel — a decanter. It might seem like part of the performance, but decanting is more than just flair. This time-honored ritual serves a real purpose in enhancing your wine experience. So, what exactly is wine decanting, and why do we do it? What is Wine Decanting? Decanting (from the Latin decanthare , meaning “to pour from the edge of a vessel”) is the process of transferring wine from its bottle into another container, a vessel usually made of glass or crystal designed to expose the wine to air. It is a practice that dates back to the Romans, who used bronze, silver, and clay vessels. Glass decanters only became common after the Venetians perfected glassblowing in the 17th century. While red wines benefit most, some white wines (like Chardonnay ) can open up with decanting. It’s not about changing the wine, but helping it show its best side. There are two main reasons we decant wine: To separate sediment. To let the wine “breathe.” In addition, a decanter is often used to enhance the presentation of the wine. Decanters often have elegant designs, making them a stylish way to serve wine at the table. 1. Removing Sediment As wine ages, especially red wines and vintage ports, natural sediments (like tannins and grape solids) can settle at the bottom of the bottle. These sediments are harmless but can add a gritty texture and bitter flavour if poured into your glass. By carefully pouring the wine into a decanter, you leave the sediment behind in the bottle. This is especially useful for older wines that have spent years resting in the cellar. 2. Letting the Wine Breathe The second — and often more common — reason to decant wine is aeration. When wine is exposed to oxygen, it softens the harsh edges, opening the wine up and releasing its aromas and flavours. Note that uncorking a bottle and letting it sit doesn’t aerate the wine much because the opening of the bottleneck is too small and not enough space exists in the bottle to introduce more oxygen to the wine. Simply put, breathing in the bottle is a myth and decanting is much more effective! How to Properly Use a Decanter for Both Young and Old Wines For young wines (generally under 5 years old), the goal is aeration — softening tannins and opening up aromas. How to do it: Open the bottle and pour the wine vigorously into a wide-bottomed decanter. In general, you should let the wine sit in the decanter for at least 30 minutes. Big, bold reds (like Cabernet Sauvignon , Syrah , or Malbec ) may benefit from longer (up to an hour). Even some everyday white wines and rosés can benefit from a short decanting, especially if they’re high in acidity or have been under screwcap and need a little oxygen to awaken. Taste as you go — once the wine smells and tastes more expressive, it’s ready to serve. For old wines (usually 10+ years old, especially reds), the goal is sediment removal and gentle aeration (too much oxygen can ruin fragile flavours). How to do it: Stand the bottle upright for a few hours (or even overnight) before decanting, so sediment settles to the bottom. In a dim light (a candle or flashlight works), slowly pour the wine into a decanter with a narrow neck, keeping the bottle angled so sediment stays behind. Stop pouring once you see sediment nearing the neck of the bottle — usually a small amount of wine is left behind. Serve the wine soon after decanting — very old or delicate wines can actually lose their character if left too long in a decanter, fading in as little as 30 minutes. When to Decant and When Not to Decant Use this quick reference guide to determine when you should decant wine, and for how long, and when decanting is not needed or recommended. When to decant: Young, bold, tannic reds (Cabernet Sauvignon, Syrah, Malbec) – decant for 1-3 hours to soften harsh edges and open aromas. Medium-bodied reds (Merlot, Zinfandel, Grenache) – a short decant (20–40 min) enhances fruitiness. Old reds with sediment (Bordeaux, Burgundy, Rioja, Barolo, Vintage Port) – a gentle decant of 10-30 minutes max just before serving to remove grit. Some whites & orange wines (Chardonnay, Viognier, natural/orange wines) – a quick decant of 15-30 minutes to release complexity. Closed or “tight” wines (any wine that smells muted or tastes flat at first sip) – oxygen helps bring it alive. When not to decant: Delicate, very old wines (20+ years) – may fade quickly; only decant right before serving if needed for sediment. Light-bodied reds (Pinot Noir, Gamay/Beaujolais, many natural wines) – often lose nuance with too much air. Most sparkling wines (Champagne, Prosecco, Cava) – decanting robs them of bubbles (except rare cases where sommeliers use it to soften aggressive fizz). Already “open” wines – if aromas leap out immediately after pouring, decanting isn’t necessary. Do You Need a Fancy Decanter? No. While elegant glass decanters can enhance the experience, the main goal is exposing wine to air. If you don’t have a decanter, you can pour wine into any clean glass jug or pitcher, pour it back and forth between two containers, or even swirl it in your glass. These methods can achieve some of the same effects without a decanter. That said, a well-designed decanter adds a touch of ritual and style to the moment — and for many wine lovers, that’s part of the joy. Wine decanters come in many shapes and sizes: Wide-bottomed decanters maximize oxygen exposure, which is great for young wines. Narrow, tall decanters are better for delicate older wines where too much oxygen could harm the flavour. Final Thoughts Decanting is a small step that can make a big difference in how a wine tastes and feels. Whether you’re opening a special aged bottle or just elevating your weeknight red, taking a few minutes to decant can unlock a more expressive, enjoyable wine experience. So, next time you open a bottle, give it some air — your taste buds will thank you.
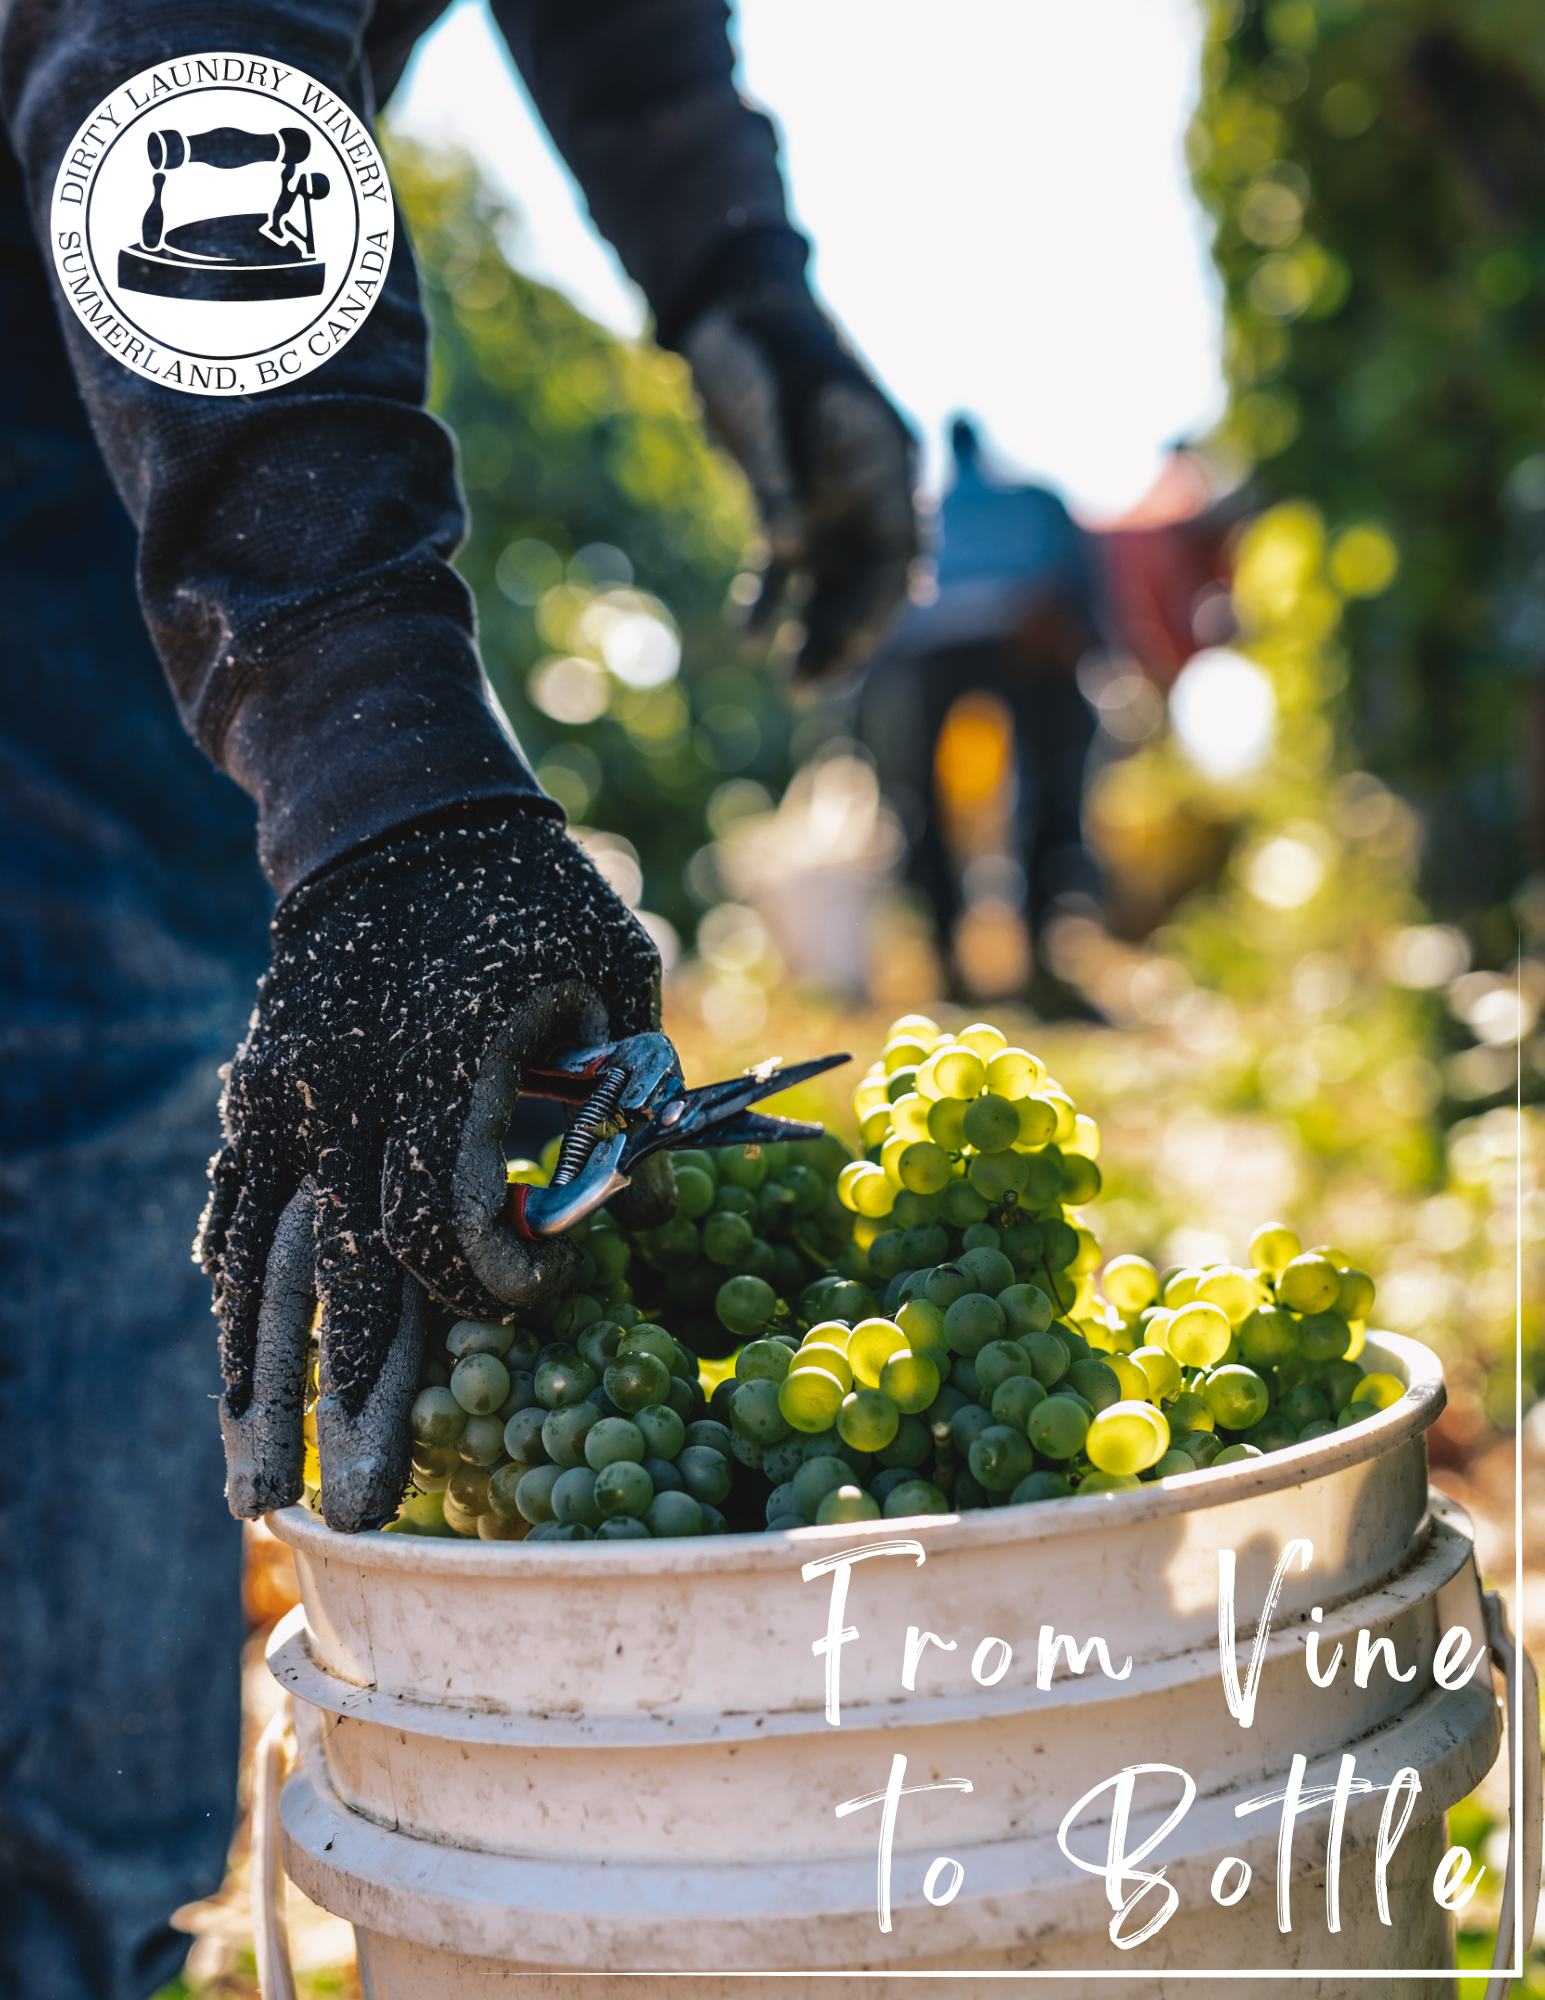
There’s something truly fascinating about harvest season in the Okanagan’s wine country. As summer fades into fall, vineyard-covered hills come alive with vibrant colour, and orchards are buzzing with activity. What is not so visible is the journey happening behind the scenes — a process that transforms humble grapes into the wine we love. 1. The Countdown to Harvest Despite what you might think, harvest season doesn’t begin with picking. All year long, vintners have carefully tended to their vines: pruning in the winter, managing canopy growth in the spring, and protecting clusters in the summer. The Okanagan valley’s diverse microclimates mean that harvest timing varies widely depending on location and grape variety. Many of the red grapes used in Dirty Laundry’s wine are sourced from arid vineyards in the hotter climate of Osoyoos and Oliver, BC. We work with several growers in the South to source red grapes that need some more heat and sunshine to fully develop. The grapes used in our white wines vary in location. Our Hush White blend, for example, uses grapes from the Yakima Valley in Washington, whereas our Madam’s Gewurtztraminer sources 100% of its grapes from Summerland, BC. Wherever the grapes are grown, typically by late August to early October, winemakers are walking rows daily, tasting berries and checking sugar levels, acidity, and ripeness, testing them in the lab to decide the perfect moment to pick. This is a delicate balance: too early and the wine may lack flavour; too late and the grapes may lose acidity or become overripe.This isn’t just about numbers—it’s about instinct, history, and experience. 2. Picking with Purpose When the grapes hit that sweet spot, it’s time to harvest. Depending on the winery, this might be done by hand (ideal for preserving delicate grape skins and ensuring quality) or by a grape harvester machine for efficiency. At Dirty Laundry, we pick all of our locally grown BC grapes by hand, allowing us to be selective and ensuring only the best fruit makes it to the crush pad. Grapes are typically picked early in the morning (around 6am) to preserve freshness and prevent unwanted fermentation from starting too soon—critical in our valley where daytime temperatures can still be surprisingly warm in early fall. But weather can change quickly here (with frost sometimes just around the corner), so there’s often a race against time. One cold snap can change everything. 3. From Bins to Crush Once picked, the freshly harvested grapes are rushed to the winery’s crush pad where they are received and prepared for fermentation. Grapes arrive from the vineyard and are weighed, then cleaned of leaves, stems, and damaged fruit by hand or machine. Stems are removed, and grapes may be gently crushed to release juice. White varietals like Riesling , Pinot Gris , and Chardonnay are typically pressed immediately to preserve their crisp, clean character. The juice (and skin for red wine) is collected. This is the wine “must”. Red grapes such as Merlot , Cabernet Sauvignon , and Syrah are left to ferment on their skins to extract deep colour, flavour and tannins. Juice or must is pumped or moved to fermentation tanks. This is where the transformation from fruit to wine begins. The crush pad is key to maintaining grape quality and setting the stage for successful winemaking. 4. Fermentation: Where the Magic Happens Fermentation is the heart of winemaking. Natural or added yeasts convert grape sugars into alcohol and carbon dioxide. This can take anywhere from a few days to several weeks, depending on the style of wine. Winemakers closely monitor temperature, perform cap management for red wine up to twice daily, and taste constantly to guide the process. Cap management is the process of handling the “cap” (made up of grape skins, seeds, and stems that rise to the top of the fermenting must due to carbon dioxide released during fermentation) and ensuring the cap keeps in contact with juice. This helps to retain the red colour of the wine, and ensures full flavour development as the grape skin contributes to complex aromas. Additionally, a dry, undisturbed cap can lead to bacterial growth, so proper cap management is essential. The frequency of cap management depends on grape variety, desired wine style (e.g., bold vs. soft), fermentation temperature, and winemaker preference. 5. Aging and Maturation Once fermentation is complete, wines are pressed (if red), clarified, and moved into tanks or barrels to age. Oak barrels may lend flavours like vanilla, spice, or toast, while stainless steel preserves fresh, fruity notes. During this time—anywhere from a few months to several years—wines soften, integrate, and develop complexity. The aging process differs significantly between red and white wines. Our 2022 Cabernet Sauvignon for example, was aged for 15 months in oak barrels with 75% French and 25% American. In processing we crushed and destemmed the grapes, then left them to cold soak for a day before fermentation was initiated. To make our 2024 WooWoo Gewurtztraminer , half of the fruit was cold-soaked on the skins before being pressed into stainless steel tanks, where it underwent spontaneous fermentation. The other half was crushed, destemmed, and pressed directly into the tank, where it was cold-settled, then racked and inoculated for a cool fermentation to preserve varietal character and aroma. The aging process here is influenced by the valley’s natural elements—cool nights, clean air, and a slower pace that lets the wine develop with balance and finesse. 6. Bottling the Story When the winemaker decides the wine is ready, it’s filtered (if needed), bottled, and sealed. Some wines are released quickly, fresh and vibrant. Others are laid down in cellars to evolve. But each bottle tells the story of that vintage—its weather, its vineyard, and the care that went into it. Was it a hot, dry year producing bold reds? Or a cooler vintage with elegant acidity? 7. From Glass to Experience Finally, that wine finds its way to your table. Whether you're sipping a chilled Hush Rosé on a lakeside patio in Kelowna or cozying up with a glass of Malbec by the fire in Naramata, you’re tasting more than just wine. You’re tasting the result of months (and sometimes years) of craft and care—all sparked by the simple act of harvesting grapes at just the right time. Many Okanagan wineries open their doors during harvest for tastings, events, and tours. If you visit during this special season, you might just catch a glimpse of grapes being crushed or barrels being filled, offering a behind-the-scenes look at winemaking in action. So the next time you raise a glass, take a moment to toast the journey from vine to bottle that made it possible.
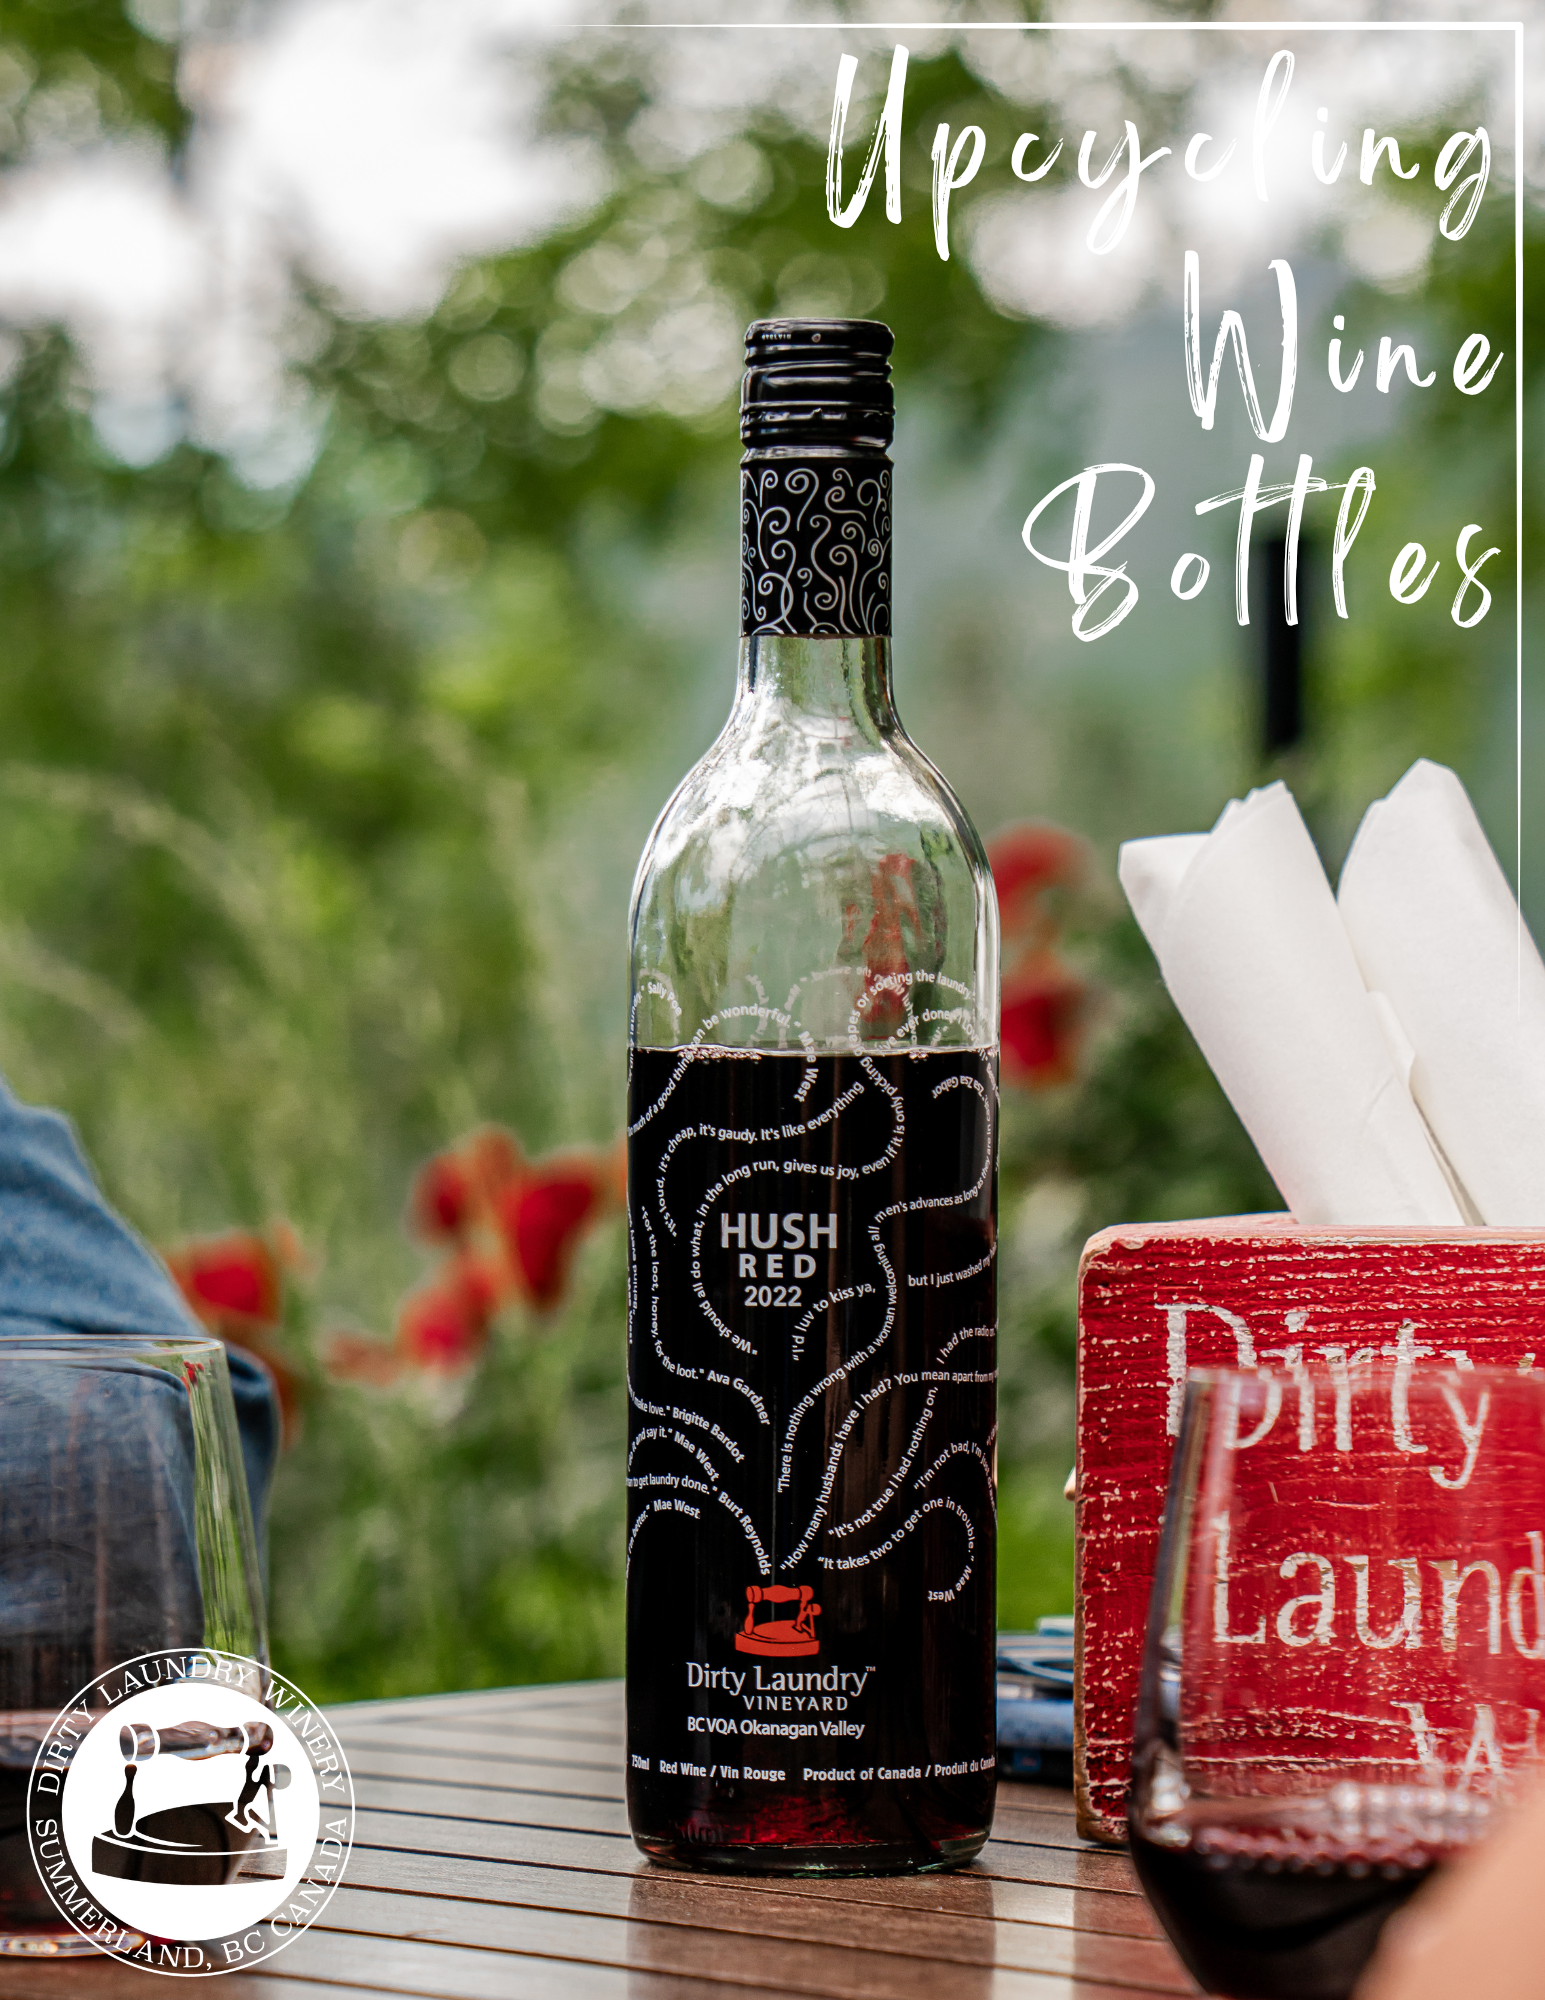
If you're a wine lover, chances are you’ve got a few empty bottles sitting around at home. Whether they are left over from a dinner party or are gathering dust in the recycling bin after relaxing evenings at home, instead of tossing them, why not give those bottles a second life? Upcycling wine bottles is not only environmentally friendly, but it also offers a great opportunity to flex your creative muscles. From stylish home décor to practical household items, here are some clever and beautiful ways to repurpose your empty wine bottles. 1. DIY Wine Bottle Vases Transform empty wine bottles into elegant vases. A simple rinse and peel of the label can turn a bottle into a minimalist centerpiece. For a more artistic touch, try painting the bottles with glass paint or black chalk paint, or wrapping them in twine, lace, or washi tape. Arrange single stems or a few fresh flowers for a chic look on your table, mantle, or windowsill. 2. Bottle Lights or Lamps Wine bottles make stunning mood lighting. Use string fairy lights or LED cork lights (which fit snugly into the bottle’s opening) to create a warm glow perfect for evening ambiance. For the more ambitious, you can drill a hole near the base, insert a bulb and socket, and turn it into a tabletop lamp or hanging pendant light. 3. Garden Watering Globes Keep your plants hydrated with homemade watering globes. Fill a clean wine bottle with water, quickly flip it upside down, and insert it into the soil. The water will slowly seep into the soil, keeping your plants moist while you're away. It’s functional and looks great in your garden or planters. Similarly, you can insert LED string lights into wine bottles and insert upside down into the ground to add a magical touch to your backyard. 4. Chic Candle Holders Use wine bottles as candle holders for taper or pillar candles. You can cut the bottles in half for a modern holder or leave them whole for a tall, elegant look. For safety, ensure the candle is secure and always burn in a well-ventilated area, or use battery powered candles. 5. Wall-Mounted Bottle Racks If you’re into woodworking or metalworking, wine bottles can be the star of a rustic wall-mounted rack. Bottles can be cut and used to hold small plants, spices, or other items. This kind of project takes a bit more skill but delivers a unique and functional conversation piece. 6. Outdoor Tiki Torches Add flair to your backyard gatherings with wine bottle tiki torches. With the right wick and some citronella oil, your bottle becomes both decorative and practical—keeping bugs away in style. Use a metal bracket or holder to secure the bottle to a fence or railing. 7. Table Number Holders for Events Hosting a wedding or dinner party? Wine bottles make charming table number holders. Slip printed numbers or signs into the neck of the bottle, or paint directly onto the glass. They add a rustic and elegant touch to any event setting. 8. Self-Watering Herb Planters Cut a wine bottle in half, invert the top half into the bottom (with a wick threaded through), and fill it with soil and herbs. The bottom half holds water, and the wick keeps the plant moist. These self-watering planters are perfect for windowsills and small kitchens. 9. Melted Bottle Cheese Tray This DIY project requires some skill and tools that not everyone has available to them, but if you have access to a kiln to melt the glass (a process called warm glass slumping) these cheese trays make superb talking points at a dinner party, or unique gifts for friends. You can paint the bottle once it has fully cooled down, leave it its original colour, or it can be decorated through etching. 10. Succulent Planter Upcycling a wine bottle into a succulent planter is a stylish and sustainable way to give new life to glass while creating a unique piece of greenery for your home. By carefully cutting the bottle—typically lengthwise or near the base—you can create a shallow, well-drained container ideal for succulents, which require minimal soil and water. Adding a layer of pebbles or activated charcoal at the bottom helps with drainage, ensuring the plants stay healthy. Once filled with cactus soil and your favorite succulents, the planter becomes a striking, low-maintenance display, perfect for windowsills, desks, or tabletops. Tips for Removing Wine Bottles: Soaking Method (Paper Labels) Soak the bottle in warm water with baking soda for 30–60 mins. Peel the label off gently. Use a scraper if needed. Remove any residue with dish soap. Oven Method (Strong Adhesive Labels) Heat the empty bottle at 200°F (95°C) for 5–10 mins. Use oven mitts to remove and peel the label while warm. Hair Dryer Method (Glossy/Synthetic Labels) Heat the label for 1–2 mins with a hair dryer. Peel off slowly from one corner. Final Thoughts Upcycling wine bottles is a creative way to reduce waste and beautify your space. Whether you go for a simple vase or an ambitious chandelier, each project gives new life to something that would otherwise be thrown away. So the next time you finish a bottle of wine, think twice before discarding it—your next DIY masterpiece might be just a cork away!